Sunday, October 28, 2012

Getting Stylish with a Stylist.

Back in August, I had posted about the Fall Wardrobe Contest that was Green Acres Mall was hosting. Seeing as there would be ten winners chosen, plus the mall would be judging my entry [not the PR agency that had contacted me about the contest], I decided to submit an essay. I totally forgot about the contest, until I received a phone call, telling me that I had won. I was super stoked. $200 to spend, plus a consult with a personal stylist? I was most definitely down!

My mom + I decided to spend the afternoon together that day, so it was a nice little trip for us. When we got to the mall, we met with Jackie, PR maven from Epoch 5 + Denise, the gal behind 3D Styling. I had worn sweats + a Star Wars tee, because I had worked 12 hours the day before + had worked that morning, so I was pretty shot. If I was going to be trying clothes on all day, I wanted to dress comfortable. When we got to the mall, I met the management of Green Acres Mall, who were so nice. They had even mentioned that they checked out the blog + liked it, which is always awesome to hear from a complete stranger! I chatted with Denise, to see what I was looking for + needed to add to my wardrobe. Basically what it boiled down to was that I needed more professional clothes to wear in the classroom. I have MORE than enough clothing to wear on the weekends, but my teacher-friendly portion of my closet is lacking.

We walked, talked, shopped + joked around, which made the experience a blast. I told Denise that I was looking for dresses, sweaters + a new pair of black leggings. We hit Forever 21 first, but realized soon after that we needed to head elsewhere for what I needed. Kohl's was our next stop, where I found a fun little black dress that suits me really well. Denise also introduced me to belts, which I usually avoid like the plague [no particular reason, I just never bother buying them, unless they come with something I snagged at Forever 21]. This was only our second stop, but I had tried on more things than I think I ever have while shopping. This was serious business! After finding the little black dress in Kohl's, we headed over to Macy's. The hunt for a nice belt, black leggings + another dress would be wrapped up here. Denise told me that I should invest in a nice wrap dress, which is something I've never even thought about trying on. I tried a few on while at Macy's, but fell in love with this killer purple Calvin Klein dress [which came with a faux fur leopard print skinny belt], which everyone approved of. We also found a cute pair of leggings in the petite section - they even have zipper details on the ankle. I never buy things like this, because they are almost always too long on me. The petites were perfect! I'm also pleased with my belt purchase. Its reversible, but I have a feeling I will wear the black side in the cooler months + rock the white side when it gets warmer out.


Time flew by + before we knew it, we had to part ways. Before leaving the mall, mom + I ran into Victoria's Secret so I could snag a few things before heading home. I learned a lot from my session with Denise, including using Polyvore to create photo sets [I used it once, but totally forgot about it until she mentioned it again]. The dresses, leggings + belt shown below are items I snagged during my stylist session. The bag is an old standby of mine, but the bracelet + shoes are on my wish list.

Wear to Work

I never thought I'd I never thought I'd like the experience of working with a stylist, but it was a great experience. I tried on items I would normally walk past + am now becoming familiar with belts. I'm not going to ditch anything in my wardrobe anytime soon, but my future purchases will be items that can work in + out of the classroom.

Have any of you ever consulted with a personal stylist before? If you haven't, would you be interested in doing so?

Sunday Social, Volume Eight.

This week's Sunday Social is all things Halloween. If you want to participate in the weekly link party, head over here + join in on the fun.


1. What was your favorite Halloween costume as a kid? My Rainbow Brite costume! My mom always made us the most amazing costumes.


2. If you could go back and dress up as something what would it be? Ooooh, I don’t know. I can always utilize older ideas for another Halloween down the road.

3. Favorite costume as an adult? My friend Tom + I dressed up as characters from the film, Juno. That was probably the best, only because people who didn’t know me really thought I was pregnant, hah! My mom, of course, made the belly for the costume, which was fantastic [she’s a genius with a sewing machine]. Definitely need to start working with one more.


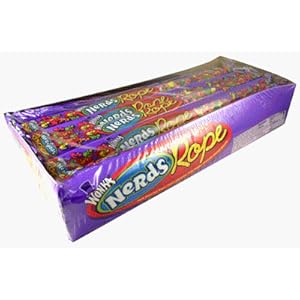
4. Favorite Halloween Candy? I don’t know if there is anything specific that I crave around Halloween. I will tell you this – I used to have a serious addiction to Nerds Ropes, which I just happened to consume in the fall/winter months.

image via

5. Favorite Halloween Memory? Probably the year my brother + I begged my mom to have store-bought costumes. I know it KILLED her to buy them, but we wanted those craptastic plastic masks like the rest of our friends. When I looked back on the pictures, I laugh at how horrible we looked.

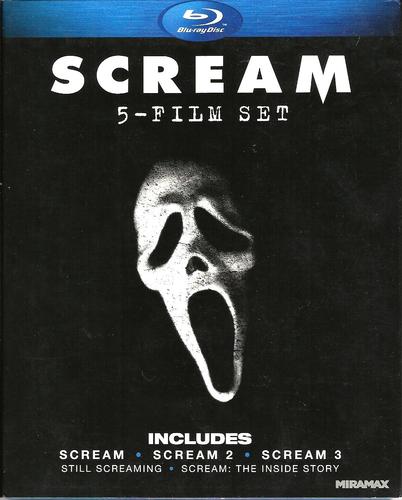
6. What is your favorite scary movie? Scary movies + I don’t mix well – I’m afraid of my own shadow! The only ones I’ve been able to stomach without having nightmares for days on end are those in the Scream series.

image via

Thursday, October 25, 2012

Teach Me Something Thursday, Volume Eight.


Howdy! This installment of TMST is brought to you by my partner in craft, Sarina. She is going to teach you how to make paper streamers + rosettes for Halloween, but these can be used for any holiday/event you are hosting. I made this with her, so I can vouch that this is something that is simple, but super fun to make.

Sarina here from Nerd Craft Librarian. Are you planning any Halloween get togethers? Here are some quick and easy paper decorations! Enjoy!


Paper Streamers


Materials & Tools
               Paper (we used cardstock)
               Scissors or paper cutter
               Coordinating thread
               Sewing Machine


Instructions 
               Cut a bunch of strips of the card stock (a paper cutter makes this step super easy)
               Make sure your machine is all threaded up and ready to go
               Take one of the paper strips and feed it through
               Repeat this step until the streamer is as long as you want
               Hang it up wherever you want! 


Paper Rosettes 

Materials & Tools 
               Card stock paper 
               Exacto Knife 
               Ruler 
               Glue Gun 
               Hole puncher


Instructions
               Use your ruler as a straight edge and take use the exacto knife to score the paper horizontally. This step just makes a groove and makes the paper easier to fold so make sure you don't press to hard! 
               After you paper is scored, accordion fold. After that step, fold the paper in half
               Repeat this step two more times 
               You will have three 'fans', break out your hot glue them together to form a circle
               Cut a circle from another piece of paper then hot glue it to the center
               Once dry, cut a hole and string it anywhere you desire! 

You can find more of Sarina's fantastic crafts over at Nerd Craft Librarian.


Monday, October 22, 2012

Lilly.

The last few days have been pretty rough for me, which is why I have been missing in action. On Friday, my Aunt Lil, who is also my godmother, passed away. She had been ill for quite some time, but was recently been diagnosed with cancer + no one was quite sure how much time she had left. That time was much shorter than any of us had anticipated.

Beautiful sisters: Debbie, Cindy, Kathi + Lilly.

I have a unique bond with all of my aunts, but the one I saw the most was Lil. When we lived in Florida, she would often visit us, staying for weeks at a time. My friends Sean + Tami saw her so much [either when she came to Florida or when they came to visit me after I moved back to New York] that they too called her Aunt Lil. We bonded over shopping, lounged around the pool + acted like fools. We used to laugh so hard that we would cry. I remember one time Lil was talking about how her ass sagged in her bathing suit. Out of nowhere, I started talking like an old Jewish woman who had smoked far too much + I told her to get some blue painter's tape, to tape up her ass. Lil + my mom were hysterically laughing, as I kept the charade up. This was always something we joked about, even as her health had started to decline. She was the Fuckmeister + I was her little Fuckmeister [or Fuckmeister Jr. - whichever she was in the mood to refer to me as].

She wasn't perfect [none of us are], but she always made sure she told me how much she loved me + how proud she was of me. Always. Even when I had decided to take a break from school, she understood that I needed to experience life, but told me that she knew I would go back when I was ready, which I did. She loved her children dearly + always spoke about their accomplishments. Sometimes she drove them up a wall [like any mother does], but she would have given her life in a split second for them, no questions asked.

Her daughter, Debbie, gave a beautiful speech at the cemetery. She wanted to keep it lighthearted, like her mother would have wanted. She spoke about how since she has grown up, she understands her mother more now + sees more of her mom in her. Deb said how her mother wore her heart on her sleeve, didn't take shit from anyone + loved us all immensely. She also mentioned her mother's love for Diet Pepsi, shopping [especially HSN/QVC], + coffee, which helped lighten the mood. Lil would have been so proud of her, as she always has been. She has become such a wonderful young woman + has accomplished so much. My aunt Kathi + my mother also had a few words to say about their sister, which were heartfelt. My cousin Catherine also read a beautiful poem by Linda Ellis, called "The Dash" + my Uncle Marc concluded the ceremony with a prayer. It was so hard dropping that white rose into the ground + taking that shovel full of earth to sprinkle upon her casket. I know she is no longer suffering, + that is what is important.

Debbie + Lilly, 1985.

Below is a song that I thought was appropriate + has an interesting backstory as well. Back in 1996, Lil had bought The Smashing Pumpkins tickets for my cousins + I. She had misplaced the tickets, but was convinced someone had stolen them [she suspected the housekeeper, if my memory serves me correctly]. Months later, she eventually found the tickets + remembered that she had indeed placed them in that spot, for safe keeping. Oh, Lil. You will be sorely missed. Thank you for the memories, I will treasure them forever.

Sunday, October 21, 2012

Sunday Social, Volume Seven.


I'm a little late on the Sunday Social due to something I will explain later in the week, but here are this week's questions. If you'd like to read more Sunday Social posts, head over to the link-up.

1. What do you value most in life? I value the relationships + experiences I have with others. Even if it’s a quick encounter with someone I’ve just met, those experiences are priceless.
2. What do you think is the greatest invention in your lifetime and why? Hmmm, probably portable personal computers – think of how much work you can do from various outlets? Its so convenient.
3. What do you think is the secret to a good life? Taking time to look around + experience things, good or bad. Expressing emotions. Living.
4. What would you most like to be remembered for when you’re gone? I’d like to be remembered for my kind heart, my ability to stand my ground + my generosity towards others.
5. What accomplishment in your life are you most proud of? Becoming a certified Social Studies teacher. Granted, I haven’t landed a job yet, but I have the credentials to do so!
6. If a movie was made about your life, who would you want to play you? Drew Barrymore, Thora Birch, Rachel McAdams or Robin Tunney. 

Friday, October 19, 2012

Sponsor Spotlight.

While you get ready to welcome the weekend with open arms, I wanted to introduce you to a few fantastic folks showcased on the sidebar of this humble blog.

173230_Solestruck-116

  I love Solestruck. They are a fantastic footwear company based out of Portland that I discovered last year. They carry the most fantastic shoes, for both men and women. Now, I don't just love Solestruck for the brands they carry, I really love them for their customer service team! A month ago, I had an order that didn't ship immediately, due to a killer sale they had [which wound up bringing in a plethora of orders]. I called just to see the status of my order, + I said off the bat that I understood if it was delayed due to the sale - I had just wanted to check in. Ashley, who is probably one of the best customer service representatives you will ever speak with, checked the status of the order. While we waited for the computer information to load, we had a really nice conversation. It is rare to have such a fabulous experience - especially on BOTH ends of a customer service call. That experience has me telling everyone I know to support Solestruck. They have a fantastic blog that I love perusing + I just discovered they published a magazine, which I plan on getting.

Solestruck can also be found on Facebook, PinterestTwitter + YouTube.


Hey all! I'm Niamh {it's Irish and you say it NEEV}, and I blog over at Finding the JOYS in My JOURNEY. I'm a hard-working student, trying to live up to my ambitions and potential. The blog name pretty much states the purpose - I blog about the little things that give me joy, firstly to help me live with more gratitude, and secondly in the hope that I can spread that joy around. You can read about everything from style to food to boys, and then some!
Feel free to drop by - I'd love to return the favor!

You can also find Niamh over at Pinterest.

Thursday, October 18, 2012

Teach Me Something Thursday, Volume Seven.


The seventh installment of TMST is another Halloween themed gem, from my friend Corinne, the blogger behind Brilliant Nature. She used to live on Long Island, but recently relocated to Tennesse with her boyfriend, Andrew. If she still lived here, she would most definitely be a part of our blogger craft nights, but as you'll see from the post below, she's being super crafty in her new home!

When Michele mentioned Halloween themed TMST’s, I knew I had to jump right on it. Ever since I was a kid, Halloween has been my favorite holiday. It’s right in the middle of autumn (the best season), something to really look forward to in October (the best month), and everything about it has always felt magical. If you got to know me, you would understand why it’s so important. Even just as a human, how can you not appreciate the crisp air, happy children, an excuse to wear costumes and wigs and face paint, celebrating in the street at night, and free candy?! C’mon. Turns out the day after Halloween is also a holiday! I remember learning a little bit about Dia de los Muertos (Day of the Dead) in elementary school, but I went to Catholic school, where we would celebrate All Saints Day on November 2nd, and we never delved too deeply into the history of Dia de los Muertos. I’m self taught on what I’ve learned is an important day in Mexican history, so I want to teach you too!

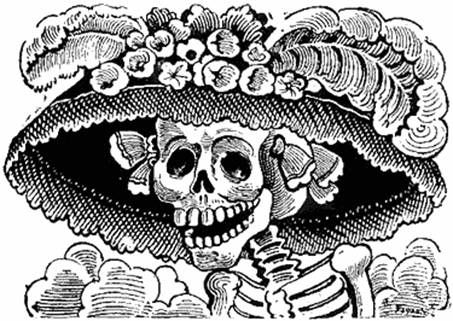
Dia de los Muertos, as I just mentioned, originated in Mexico. Translated to Day of the Dead, it is celebrated on November 1st. The purpose of this holiday is to pray for and commemorate friends and family who have passed. It is celebrated in connection with the Pagan holiday of Samhain, and the Catholic’s All Saints Day and All Souls Day. The holiday has spread throughout the world. In Spain, Dia de los Muertos is celebrated with festivals and parades, and in Brazil people celebrate by visiting churches and cemetaries. All in celebration do focus on the one true meaning which is to remember loved ones who have passed. Often, the favorite foods and drinks of those who have died are prepared. Dia de los Muertos celebrations can be traced back about 3,000 years. And though I find it a bit morbid that pre-Hispanics kept the physical skulls of loved ones lost to symbolize death and rebirth, overall I think it is an absolutely beautiful tradition, made more by the traditional artwork. The figures of Catrinas (shown above), marigolds and my favorite – Calavera, more commonly known as sugar skulls.
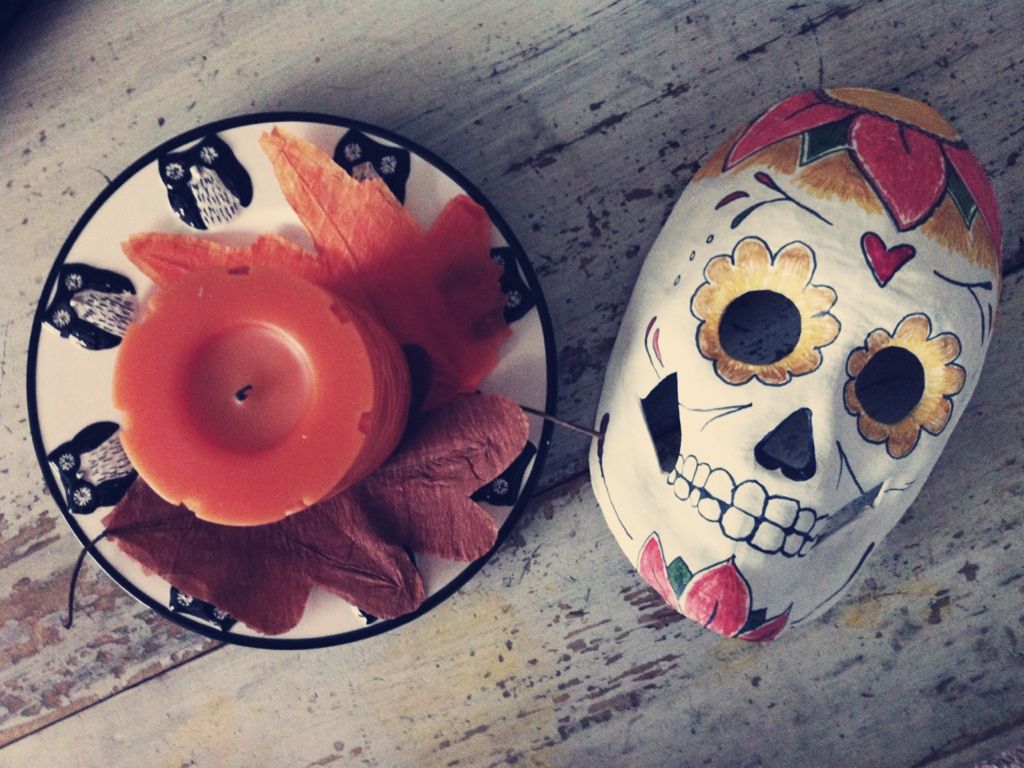
So, in conjunction with my history lesson, I prepared a little craft! She’s simple, but I’m proud of her. I found the paper mache skull at Michael’s sometime in August and I knew just what I wanted to make of it, even before I took on the (super fun!) task of TMST. I painted her white with standard acrylic paint and drew on the design with Prismacolor and Sharpie markers. If you do a quick Google image search for sugar skulls, you will see that they can display literally any designs, shapes, colors or textures that you choose. I went with floral because that’s just my style – and the marigolds stick in my head whenever I think of Dia de los Muertos. Isn’t she pretty?

Share with us your Dia de los Muertos history, fun facts, or any crafts you’ve made relating to this special day!

For more autumn inspiration + awesomeness in general, head over to Brilliant Nature.

Wednesday, October 17, 2012

Instagramification.

Holler. I haven't done one of these posts recently, so I figured I'd fill you in on what my pals on Instagram see on a regular basis.


This is the bulletin board I created last week. We made the ghosts out of their footprints. This was so fun to make! This week we are creating a scarecrow for the school-wide contest. 


I've taken my love for cats to a whole new level. My Crochet Cat Coffee Cozy arrived from Sugar Junkie + I am obsessed with it.


I did some simple Halloween nail art that looks far more complicated than it was. Here it is [let each coat dry before applying another]: base coat, one coat of white polish, one coat of orange randomly placed on nails [stripes, half the nail, whatever you want - don't worry about it looking perfect, its getting covered up], + topped with black crackle. Super simple, as long as you are patient about the drying time.


My Hunter wellies arrived today! These babies were only $75 for the youth version, as opposed to the adult version for $135. I'm short + my size 7 feet fit in the size 6, with some room for fleece socks [which are way cheaper for the kids version as well]. I can't wait to wear them out + about. I was also eyeing the Cable Cuff socks over at Nordstrom tonight. I'll have to wait until my birthday to snag some more. I only bought these because I sold so much stuff on Instagram. Selling on Instagram is so much easier than eBay!


I am making some really awesome skull bracelets. They'll be up in the Etsy shop next week, for $15 each. If you want one before they hit the store, you'll save $5 PLUS get free shipping. If you want one, feel free to contact me.

If you're on Instagram, make sure to say stop by + say hello. You can find me on my two accounts: @stellarmichele + @closetshopaholic.

Monday, October 15, 2012

UNREAL Candy.

I try to eat as healthy as possible, but sometimes, I just want to stuff my face with junk food [chocolate being my weakness]. Recently, I noticed UNREAL, a new candy brand being sold at CVS. The packaging looked cool, but I didn't bother trying it. Anytime candy has been made healthier, it either tastes like cardboard, or keeps you glued to your toilet seat until further notice. Last week, I decided to connect with the folks at UNREAL to run their product by my chocolate loving lips.


The folks at UNREAL sent me an assortment of goodies to try out. They box contained samples of all of the products currently available on shelves [if you don't have CVS by you, Target carries the candy, as well as Amazon]. None of the products contain corn syrup, partially hydrogenated oils, GMOs, artificial ingredients or preservatives, which many of our favorite candies are saturated with. The coloring for the products is derived from fruits + vegetables as well.


The first candy I sampled was #8, which is by far, my favorite UNREAL candy. Its like a cross between a Goldenberg Peanut Chew + a Snickers bar. Total heaven. Its funny - whenever I eat a Snickers bar, I always feel sick about ten minutes later, from sugar + junk overload. No gross feeling after consuming #8!

The next day, I sampled #5 while driving to work in the morning [don't judge - if you look at the label, there are breakfast bars that are far worse for one to eat in the morning]. It reminded me of a dense Milky Way bar. Still delicious, but its no #5. Definitely filled me up for the morning, along with my water + cup of coffee.

That evening, I tried #77, which are peanut butter cups. Although I prefer the homemade [but not as healthy] ones my mom + I make around the holidays, these are definitely more decadent than Reese's.

The next night, along with Erich's mom, we tested out the chocolates in the candy shell [#41 + #54]. Unfortunately, these were our least favorite. Maybe its because we are accustomed to M&M's, but the flavor was not my favorite. #41, which is the candy coated chocolate, lacked sweetness + had an odd aftertaste. All we noticed on #54 was the peanut flavor. I was bummed, because I really wanted to like these. I have more left, so I will come back to these again to retest.

Now, with my opinions stated [good, bad, + indifferent], keep in mind that we all have different tastes. What I liked you might not + vice versa. As always, read the label before consumption - the links I provided throughout the review also have ingredient info linked to the page as well. The price points on the candies are very reasonable [no more than $1.25 per candy], especially for a candy that uses quality ingredients. UNREAL also makes miniatures, which would be a great healthy alternative to hand out on Halloween, or to keep on the desk in your office.


Have you tried UNREAL? If not, do you plan on trying their line of "unjunked" candy?

Sunday, October 14, 2012

Sunday Social, Volume Six.


Sunday Social is back to the good ol' Q+A this week. If you want to link up + join in on the fun, head over to A Complete Waste of Makeup.
01. Favorite childhood book? I was an extreme bookworm as a child. I once finished a book from The Baby-sitters Club series from start to finish while my mother was getting her hair permed at the mall. To choose only one book is extremely difficult, but I am going to go with Are You There God? Its Me, Margaret.
02. Favorite Book lately? I will always go back to Nick Hornby’s High Fidelity [I recently gushed about the book over on Literate + Stylish]. I am currently reading Neil Gaiman’s The Graveyard Book.
03. Book you wish you could live in? Ooooh, I’m going with a graphic novel for this one [technically, it IS a book]. Ghost World! Enid + Rebecca have the raddest, most random adventures.
image via

04. If you could be any character from a book who would it be and why? Enid Coleslaw, from Ghost World. Enid + I share elements of weird that I totally dig. 
05. Favorite Book turned Movie? I sound like a broken record, but again, High Fidelity. Its rare to find a book that is turned into a well made film. I love both!


One of the photos used for Literate + Stylish.
06. Favorite Magazines? Nylon, Paper, Rolling Stone + Spin. I also really love Long Island Pulse Magazine – I intern for them! While I dig other publications, these are usually the only ones I snag issues of - everything else I read online.

Friday, October 12, 2012

Sponsor Spotlight.

Happy Friday, everyone! I hope October is treating you well. I wanted to introduce you to a few awesome new sponsors that will be joining the blog for the month of October.


SerendipiTea is a tea company based out of Long Island + I can't wait to work more closely with the company. Owner Linda Villano carries high quality teas + tisanes [many are organic + fair trade] - SerendipiTea is even stocked at my favorite independent coffee shops, Roast. Linda recently sent over an assortment of teas for the autumnal season, including a few Spooky Teas, which are amazing. For the month of October, you can save 20% off all Spooky Teas, when using the coupon code SPOOKY TEA. I think my favorites in the Spooky Tea line are Fu Man Chu + Pagan Alms. 

You can also find SerendipiTea on Facebook + Twitter


Marianna's  mission is to create beautiful, affordable and FUN jewelry items. She believe that wearing beautiful jewelry is the key to finishing off your look, increasing confidence and putting your best self forward. She named her shop after her father's hometown of Castellammare del Golfo, Italy. Castellammare translates "Castle on the Sea" in Italian. Marianna is also offering a coupon code to readers as well. Use the code NEXTTIME15 to save 15% off all orders - it expires November 15, 2012.

You can also find Castellammare Designs on Facebook.

Make sure to swing by and say hi to these lovely ladies! If you are interested in sponsorship, please check out my sponsor page.

GlassesUSA [Sponsored Post].


Seeing as I have been wearing eyeglasses since the tender age of three, I was thrilled when GlassesUSA reached out to me. I have never ordered glasses online, but after reading up on the company + walking myself through the super simple process, I plan on snagging a backup pair, since the price is right.

Basically, if you wear prescription specs, you get the eyeglasses prescription from your eye doctor + send an image via email [or fax] to the folks at GlassesUSA. You pick out a frame, test them out on the virtual mirror, then sit back + relax until they arrive. If you don’t like them, you send them back. Not bad, right? I had a lot of fun with the Virtual Mirror. I chose the Michele – super cute + cheap glasses with my name, awesome!

Here is what my virtual glasses experience looked like:


Below is the Virtual Mirror, so you can check out a few styles on your own! GlassesUSA.com has two coupon codes available as well - Take 15% off + get free shipping on your entire order 
(orders over $50) with the code: FS15, plus take 10% off any order of prescription eyeglasses with the code Blog10.


If you end up snagging a pair before I do, let me know. I just got my eyes checked out, so I plan on swinging by my eye doctor + snagging a script, so I can order a new pair of sunglasses.

This post was sponsored by GlassesUSA, but the opinions are most definitely my own.

Thursday, October 11, 2012

Teach Me Something Thursday, Volume Six.


The sixth installment of TMST comes from Melissa, who runs the blog Dreams and Colour. Seeing as we are on our way to Halloween, she shows us a great way to carve a pumpkin using a cookie cutter!

A few years ago, I decided to try something different with my pumpkin carving for Halloween. It was an experiment on my part, especially since I am by no means crafty or good with décor, and I was surprised with how well it turned out. I received a lot of compliments on my pumpkin, not just from the trick-or-treaters (and their parents) but from my friends and family as well- who are all too familiar with my lack craftiness.
 
You will need:
A pumpkin

Cookie cutter (when I did this pumpkin, I was living in a town known for its harbour, which is why I used a sail boat cookie cutter. You can use whatever shape you like. I’ve also done cat and witch (alternating the shapes) on a pumpkin
Hammer
Knife
Spoon
Plate
Candle

How to:
Step 1: Buy a pumpkin


Step 2: Using your knife, cut off the top of the pumpkin and using a spoon (or your hand) clean out the ‘guts’ of the pumpkin


Step 3: Turn your pumpkin upside down- the hole you just cut into your pumpkin, will be the bottom (this is an important step and 9 times out of 10 I forget to do with the first shape)

Step 4: Place the cookie cutter on your pumpkin and use your hammer to push the cookie cutter into your pumpkin.  The first time I did this pumpkin, I just used my strength to push in the cookie cutter- it was so hard! The hammer definitely makes it easier! You can either hammer until the cookie cutter goes all the way through the pumpkin or you can hammer until there’s a clear outline  and use your knife to cut along the outline (this is what I do)


Step 5: Repeat step 4 until you have done the entire pumpkin


Step 6: In the centre of a plate, place a candle and light it.

Step 7: Place the pumpkin over the candle and display


That’s it! Super easy, super creative, and in my case, super impressive.
DISCLAIMER: Please be careful when doing this project. While it is simple, take caution when using a knife, hammer and candle. Be safe. ***Take on this project at your own risk. I assume no responsibility for any injuries as a result of this project***

Check out more of Melissa's musings over at Dreams and Colour.