Showing posts with label recipe. Show all posts

Wednesday, February 25, 2015

Bay Lager Beer Bread Muffins + Cheesy Beer Dip

Lately, I've been hanging out at Great South Bay Brewery. Last week, I made banana muffins with Snozberry Stout + they went over really well with the staff + patrons. While I was hanging out in the tasting room on Saturday, I was contemplating a project for this week. I wanted to make beer bread, but didn't know what brew to use. Jon, the lead brewer at GSB suggested I use Dirty Deeds, their Russian Imperial Stout. So, I took a growler home to test out my concoction. First batch was a major fail + it was right before I was having people over for dinner. I accidentally used baking soda, not baking powder, which my friends Gary + JR are never going to let me live down. Ugh, kitchen fails are rare for me, so when it happens I get a little cranky. I also wasn't too keen on the taste of the muffins with the stout - I wanted something lighter. My friend Melissa suggested I make a cheesy beer dip to pair with the muffins [she was handling the bacon jalapeño mac + cheese - which was amaaaaaaaazing], so I looked at what I had in the fridge + decided to use Bay Lager for both dishes. It turned out really well + I'm stoked for my next exbeeriment in the kitchen. Experiment + beer = exbeeriment. Get it? It sounded a lot cooler when I said it. Whatever.


Bay Lager Beer Bread Muffins
makes 12 muffins

3 cups whole wheat flour, sifted
1 bottle GSB Bay Lager
1/4 cup white sugar
1/4 cup butter, melted
1 tablespoon baking powder
1 teaspoon kosher salt
optional: an additional 1/4 cup melted butter to drizzle on top

Preheat oven to 350. Coat muffin tin with nonstick cooking spray.

In a large glass bowl, combine dry ingredients + mix well. Slowly add beer + melted butter.

Scoop mixture into muffin tin + bake for 20 minutes. Let cool in pan for 10 minutes, then transfer to a wire rack to cool. If desired, drizzle melted butter on top of the warm muffins before serving.


Cheesy Bay Lager Beer Dip
makes a boatload of cheesy goodness, mmmmmm!

1 pound Sharp Cheddar, cut into cubes
1 pound cream cheese
1 bottle GSB Bay Lager

Add all of the ingredients into a medium saucepan. Heat on medium heat, stirring well. Once all ingredients are incorporated, pour into a serving bowl.


You can substitute any cheese of your choice, or change the beers up. I suggest using the same beers in both if you're serving them together, but thats only because I like to play it safe.

Tuesday, February 17, 2015

Banana Snozberry Stout Muffins

Whenever it snows, I have the overwhelming urge to bake something. Not sure why, but I go with it. The bananas I've been ripening were ready, but I didn't have all of the ingredients for the banana muffin recipe I whipped up last month. I did, however, have some Snozberry Stout that I snagged from Great South Bay Brewery. I've always wanted to make beer bread, so why not incorporate it into my muffin recipe? The beer by itself is phenomenal, but I wanted to see how it would fare in a kitchen creation. As I had anticipated, they're delicious + the powdered sugar adds the perfect touch.


Banana Snozberry Stout Muffins
makes 24 muffins

Dry Ingredients:
1 teaspoon salt
1 teaspoon baking soda
3 cups flour [I used 1.5 cups white flour + 1.5 cups whole wheat flour]

Wet Ingredients: 
1 bottle Great South Bay Snozberry Stout
1 stick [1/2 cup] unsalted butter, room temperature
4 ripe bananas, mashed with a fork
1 teaspoon vanilla
1 cup light brown sugar [you can use dark or white sugar, it'll just change the flavor profile a bit]
2 eggs, slightly beaten
powdered sugar for dusting

Add butter + beer to a saucepan. Heat on low//medium heat until the butter is melted. Take off the heat + transfer to a bowl. Let it hang in the fridge for fifteen minutes to cool. Note: if your beer is cold + your butter is room temperature, it might seem like the butter is curdling, but its not, the beer just solidified the butter again. I learned this the hard way. ¯\_(ツ)_/¯


Preheat your oven to 350 + get your muffin pans ready [use paper liners or a non-stick spray. I'm lazy + always opt for paper liners = less clean up].

Add flour, salt + baking soda into a mixing bowl + whisk.


In a separate bowl, mix bananas, sugar + vanilla. Add in the egg + gently mix. Slowly alternate adding the dry ingredients + beer//butter mixture in until incorporated, but don't over mix!


Spoon mixture into muffin pan - you can fill a little more than 3/4 of the way, these don't rise too much.


Bake for 15-20 minutes. Cool on stove for 5 minutes, then put on a wire rack to cool for additional 10 minutes. 


When you're ready to serve, add a dusting of powdered sugar to the top.

Sunday, January 18, 2015

Sprinkled Donut Crunch Marshmallow Squares


While roaming the aisles of Target last week, I stumbled upon Sprinkled Donut Crunch. When it comes to cereal, I'm usually a creature of habit. The only time I don't shy away from new cereals is if I am making marshmallow treats, which was the first thought that came to mind when I noticed the box on the end cap [conveniently located right between the toy aisles - smart move, Target].

I planned on taking a few pieces out of the bag, just to test it [hi, not wasting calories on mediocre junk food]. Of course, a couple bites turned into a few handfuls. It tastes like a slightly sweetened vanilla version of the original Cap'n, but doesn't scratch the roof of your mouth. The sprinkles give it an extra bit of crunch, which I thiiiiink is what hooked me.

The next day, I went back + grabbed three more boxes - in all fairness, one of those boxes is for my cousin. But these turned out so good, I'm tempted to snag another box as a backup. Hi, my name is Michele + I am addicted to Sprinkled Donut Crunch. It could be worse, right?

Anyway, enough talking. Here's the recipe. Enjoy!


Sprinkled Donut Crunch Marshmallow Squares [makes 24 squares]
1  16 ounce bag of Marshmallows
7  tablespoons butter
1  tablespoon vanilla extract
    pinch of salt
    nonstick cooking spray

Before you start working on the treats, prep your baking pan. Line it with wax paper + lightly coat with cooking spray.

In a large pot, melt the butter on low. Once most of the butter is melted, add the salt, vanilla extract + marshmallows. Stir until melted + remove from burner [I slide to the other side of my stove to finish].

Add the Sprinkled Donut Crunch cereal into the pot + fold//stir until all bits of cereal are coated.

Scoop mixture into whichever type of pan//dish you have around. The general suggestion is usually a 13 x 9 x 2 pan, but any container you line with wax paper should suffice.

Make sure you gently press down on the cereal to help bind it better. To be honest, the easiest way to do this is to scoop the ingredients into the pan, spray clean hands with some nonstick cooking spray, then use your hands to press down on the cereal. I know, your hands will be a bit greasy, but one of the best tools in the kitchen are your bare hands.

Let the treats cool for an hour, then slice into squares.

I don't have exact nutritional information, but did some math to toss out a ballpark figure. It depends on the brand of marshmallows you choose, salted vs unsalted butter + how big you cut the squares. These numbers are an average of the ingredients I used, creating 24 servings.
Calories: 150
Fat: 1.5g
Sodium: 175mg
Carbohydrates: 43g
Sugar: 20g

Friday, January 16, 2015

Banana Coconut Yogurt Muffins

For years, I have said I was going to make banana bread with the next batch of bananas that get super ripe. They almost always meet their fate via Vitamix, because I can be a lazy human + its easier to toss them into smoothies. After being on an insane cooking kick this week, I looked at my sad, brown bananas + decided they deserved something different, but still on the healthy side. After figuring out what ingredients were necessary to make banana bread [which seems to be a very forgiving recipe, ingredient-wise, which is good for impulsive//impatient bakers like myself], this is what I came up with.


Dry Ingredients:
1 1/2 cups whole wheat flour
3/4 cup light brown sugar
1/2 teaspoon baking soda
1/2 teaspoon salt

Wet Ingredients:
3 bananas, mashed [I used my fork to squish 'em up]
2 large eggs, slightly beaten
1/3 cup olive oil
1/4 cup Noosa Coconut Yoghurt [I get it at Target, but you could sub Greek yogurt if need be]
1 teaspoon vanilla extract

Preheat oven to 350 degrees. Coat muffin pan with a non-stick spray or use paper liners.

In a large bowl, add dry ingredients + mix with a whisk [you can sift if you'd like, but this is faster + less mess to clean up, at least in my world]. Set aside.

In a separate bowl, mix wet ingredients together. Fold in the dry ingredients + mix well.

Scoop into muffin pan, only filling three quarters of the way- these babies need room to grow.

Cook for 15 minutes. Cool on stove [in the pan] for 5 minutes, then put onto rack to cool for additional 10 minutes.

This recipe makes anywhere from 14-16 muffins, depending on how high you fill the pan. If you only have one muffin pan, pour the rest in a loaf pan//small glass dish [coated with non-stick spray] + let that cook for an extra five after you take the muffins out.

Seeing as I went pretty mellow on the ingredients in here, I didn't feel guilty splitting open a muffin + adding a bit of butter. Its amazing if you do it while they're still hot, but you can toss the muffin in the oven//microwave to warm it up.

Sunday, April 13, 2014

Roasted Potatoes + Red Onions = Two Variations.

Last summer, I was on a roasted veggies kick. The other day I was talking to my friend, Tori, about blogging recipes. She mentioned how the roasted veggies I made always looked good, so I decided to make something simple - roasted potatoes + red onions.  When I say simple, I really mean it. The most difficult task you're going to encounter is waiting until the potatoes cool down so you don't burn the roof of your mouth.


I tested out two recipes. Feel free to follow them or branch out + change up the spices.

Roasted Cinnamon Ginger Potatoes w// Red Onion
Ingredients:
1 lb potatoes, cut into chunks [only had organic Russet + they worked well]
1/4 lb red onion, sliced
1/2 teaspoon of each: cinnamon, ground ginger, pepper, + salt
1 tablespoon olive oil

Traditional-ish Roasted Potatoes w// Red Onion
Ingredients:
1 lb potatoes, cut into chunks
1/4 lb red onion, sliced
1/2 teaspoon of each: pepper, rosemary leaves [crushed], sage, salt + thyme
1 tablespoon olive oil

Tools:
Aluminum foil
Baking dish [9" x 13" is a good size]
Clean hands
Spoon


Preheat oven to 450 degrees. 
Line your baking dish with aluminum foil [super easy cleanup + helps transport from tray to serving dish]. 
Place potatoes + onion slices in baking dish, then add olive oil. As evenly as possible, sprinkle the spices on top. 
With clean hands, mix//coat the potatoes + onions in oil//spices. Trust me, this is the way to go - just like I said last week, referring to grandma's meatball mixing technique - your hands are one of the greatest tools in the kitchen.
When you're done, wash your hands, ya filthy animal.

Put potatoes into the oven + set the timer for 30 minutes. Stir [with a spoon, not your hands] after 15 minutes. Shut the oven off. Remove potatoes, stir, then place the dish back into the oven for another 15 minutes [yes, while the oven is off - you read that correctly]. Remove from the oven + serve.

I am a lazy human when it comes to scrubbing dishes, so the aluminum foil is my BFF. Plus, If I'm transporting into a bowl, all I do is wait for the aluminum foil to cool, pick up the corners + dump into the bowl. 

Out of the two recipes concocted, the cinnamon ginger is my favorite. Next batch, I'm going to double the onions, because they're the first to disappear from the dish. 

Wednesday, April 2, 2014

Raw Fruit + Nut Bites.

I am the worst when it comes to posting recipes. There are enough recipes strewn around my room to assemble a cookbook [not to mention an obnoxious amount of food pictures on my iPhone], but they never make it to the 'net. Well, I decided to go through the recipes, recreate them + start sharing them.

This girl = total sucker for snacks. Instead of sitting at the table + enjoying a meal, I usually eat standing up [a habit I developed during high school marching band that I can't seem to break it] or in my car [not a morning person, so eating on the go is crucial so i'm not a total crankypants]. Any food that can be prepped in advance, taken on the run + not make a mess is my favorite.


These raw fruit + nut bites are an awesome snack that definitely keeps me from eating junk, plus help keep my sweet tooth in check.

Raw Fruit + Nut Bites
[makes anywhere from 1 to 2 dozen bites, depending on the size you make them]

Ingredients:
1 banana [the riper, the better]
1/2 cup rolled oats
1/4 cup raisins
1/4 cup figs, chopped
1/4 cup raw unsalted almonds [can be whole, chopped, or slivered, whichever you have on hand works. If they're whole, chop them in a blender or with a knife]
1/4 cup almond butter
1/4 cup dried apricots, chopped
1 tbsp coconut oil
1 tbsp chia seeds
1 tbsp flax seeds
1 tbsp hemp seeds
1 tbsp sunflower seeds
1/4 tsp cinnamon [i prefer saigon cinnamon for baking//sweets]
1/4 cup filtered hot water

Tools:
Blender
Large glass bowl
Small glass bowl [to soak raisins]
Measuring utensils
Square//Rectangular glass dish [to shape the bites]
Wax paper

First things first: put your raisins in a small glass dish, sprinkle them with the cinnamon + add hot water.   Stir + let them sit for at least fifteen minutes - you can work on the rest of the recipe while you wait.

Since I used whole almonds, I tossed mine into my Vitamix + let them pop around a bit, just to break them into pieces.

Put almond butter, chopped almonds, figs, dried apricots + the banana into a blender. Pulse until the ingredients are incorporated - it doesn't have to be smooth. Transfer to a large glass bowl.

Drain the raisins, but don't rinse - you want some of the cinnamon to stick to the raisins.

Prep your glass dish for the bites with wax paper, while you're at it.

Add rolled oats, coconut oil, chia seeds, flax seeds and hemp seeds + mix gently with clean hands [its like grandma's meatballs - your hands are the best tool for this trick]. The raisins shouldn't be too hot, but if you feel that they are, wait a few minutes to mix it all up.

Once the ingredients are mixed + the oats are coated, transfer to the glass dish with the wax paper. Pat down the mixture so its evenly distributed. Sprinkle sunflower seeds on top + gently press them down with the palm of your hand, so they don't come off when you cut the bites up.

Place the glass dish in the freezer for an hour or two, so they can harden up. When you're ready, remove the block of goodness + cut into bites! The size of the bites is totally up to you. These usually keep well for 3-5 days in the fridge, but I keep most of them in the freezer + defrost a handful the night before work.

If you try the recipe, let me know what you think!

Thursday, January 31, 2013

Teach Me Something Thursday, Volume Twenty-Two.


According to the cheesy 80s flick, The Allnighter, "A babe in the kitchen is worth two on the beach." While some might disagree [especially if said babe in the kitchen burns water], you can't deny that a significant other who can cook is a plus. My mom whipped up a quick sweet treat that anyone can toss together!

Heart Shaped Cookie Cutter [I love Wilton cookie cutters]
Marble Pound Cake [or whichever type of loaf cake you prefer]
Whipped Cream [fresh, canned, or Cool Whip - your call]
Heart-Shaped Marshmallows [if you can't find them, order them]

1. Cut cake into three slices, about one inch thick;
2. Use cookie cutter to cut into heart shape; place cake on plate;
3. Put whipped cream on cake + spread to form a nice layer;
4. Put another piece of cake on top of whipped cream;
5. Repeat steps 3 + 4;
6. Put a dollop of whipped cream on top + place heart-shaped marshmallow on top;
7. Stuff your face like there is no tomorrow!


Super simple + delicious. Now you don't have an excuse to toss together dessert on Valentine's Day! If you have a fun Valentine's Day recipe or craft you'd like to share, contact me - I'd love to feature you.


Thursday, January 3, 2013

Teach Me Something Thursday, Volume Eighteen.


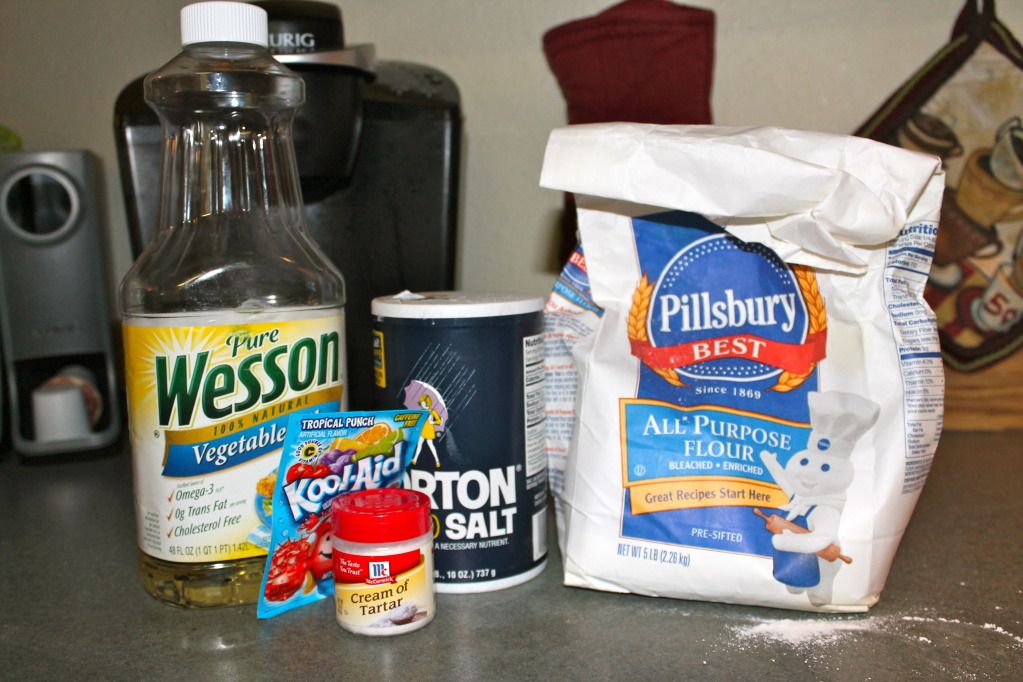
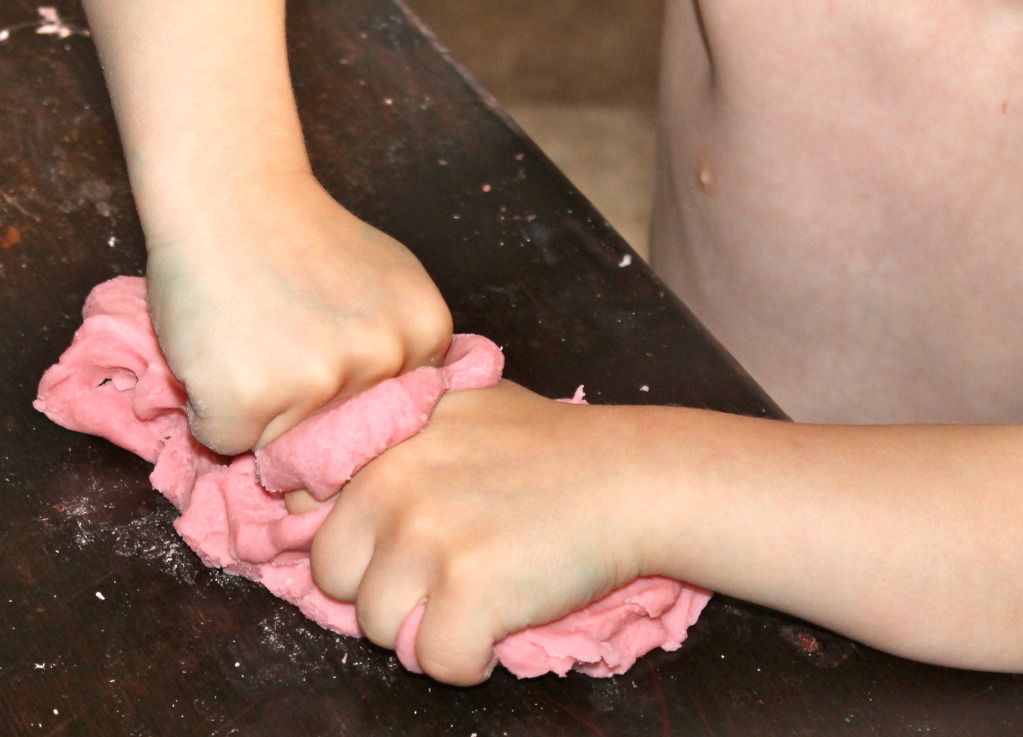
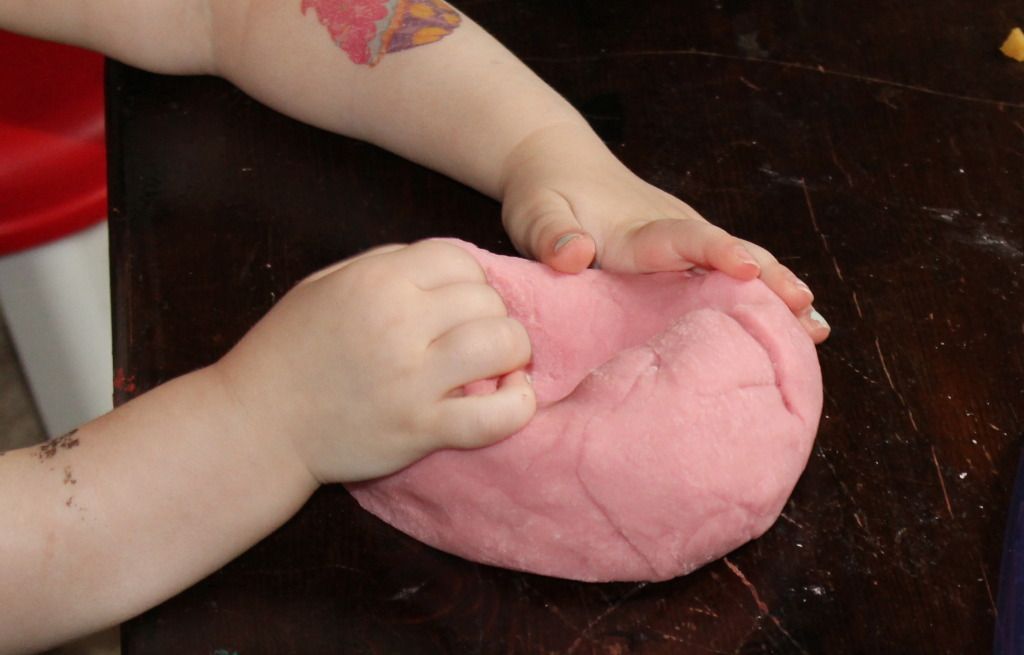
Welcome to the first TMST of the new year! The eighteenth installment is from Amber, the blogger behind My Three Bittles. Amber teaches us how to make play dough from ingredients sitting in your pantry! This is an excellent activity to develop fine motor skills in little ones [the teacher in me HAD to tell you that].

Hey guys, I'm Amber of My Three Bittles and today I'm going to teach you how to make play dough! YAY!!!!My kids got so super excited about this and spent FOREVER playing with it. So, let's make some play dough, shall we?! Yes. I think we shall. It's QUITE simple really, but I've been in such a "let's share" mood lately, that I thought I'd photograph the process and share with y'all.

So here we go:


You'll need:
1 c. flour
1/2 c. salt
1 tbsp. cooking oil
2 tsp. cream of tartar
1 pkg. unsweetened Kool-Aid
1 c. water

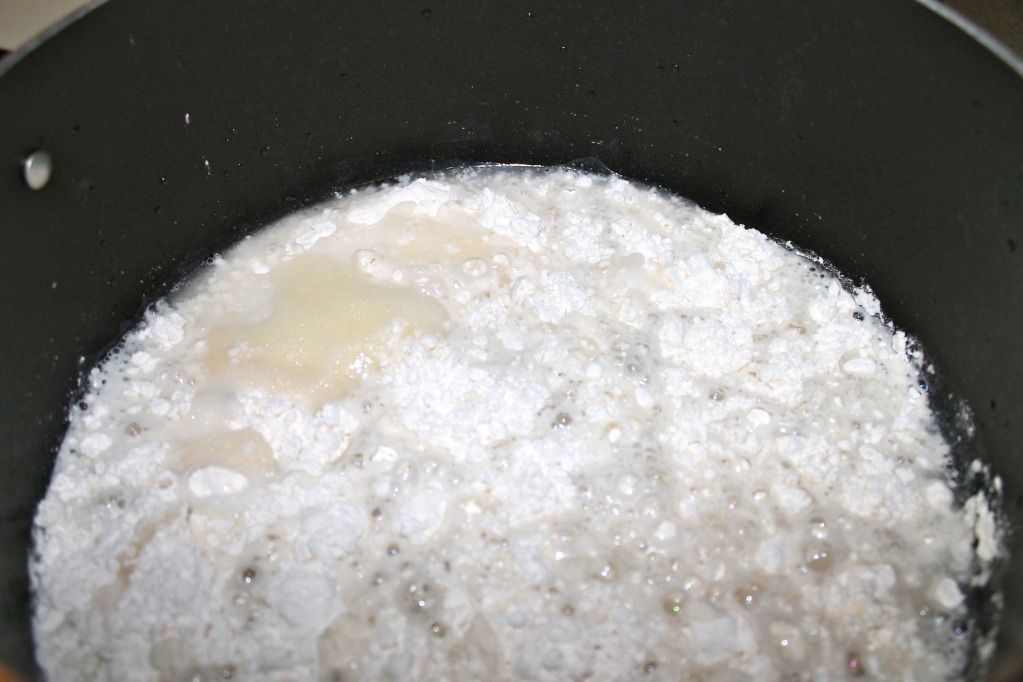
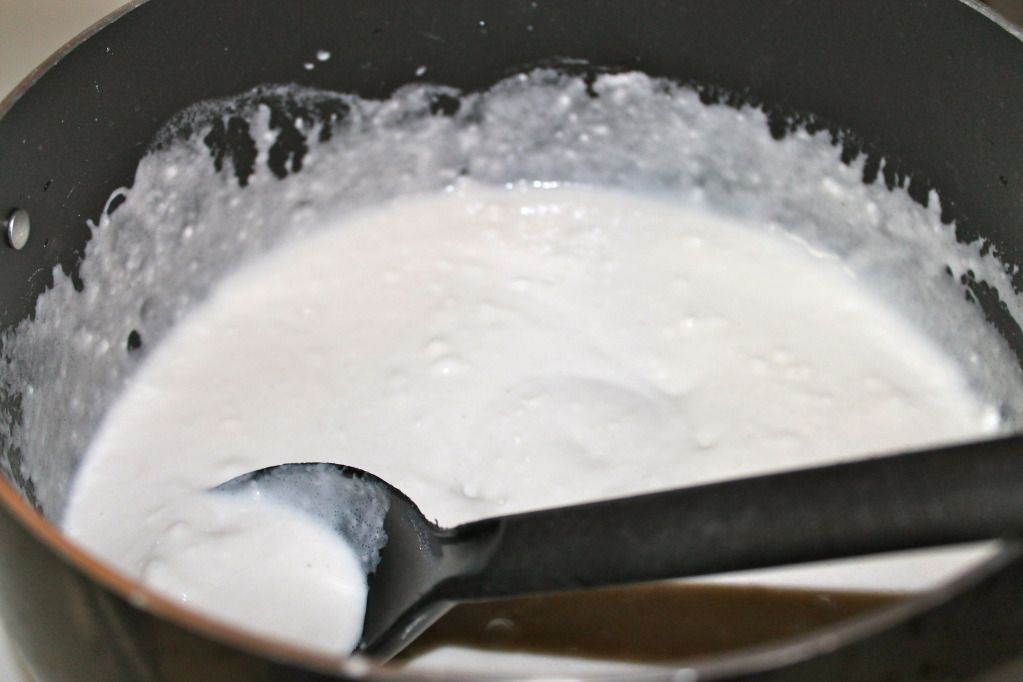
Go on and mix up your dry ingredients into your pot. Then add the oil and water.


Cook over medium heat until mixture forms a ball.


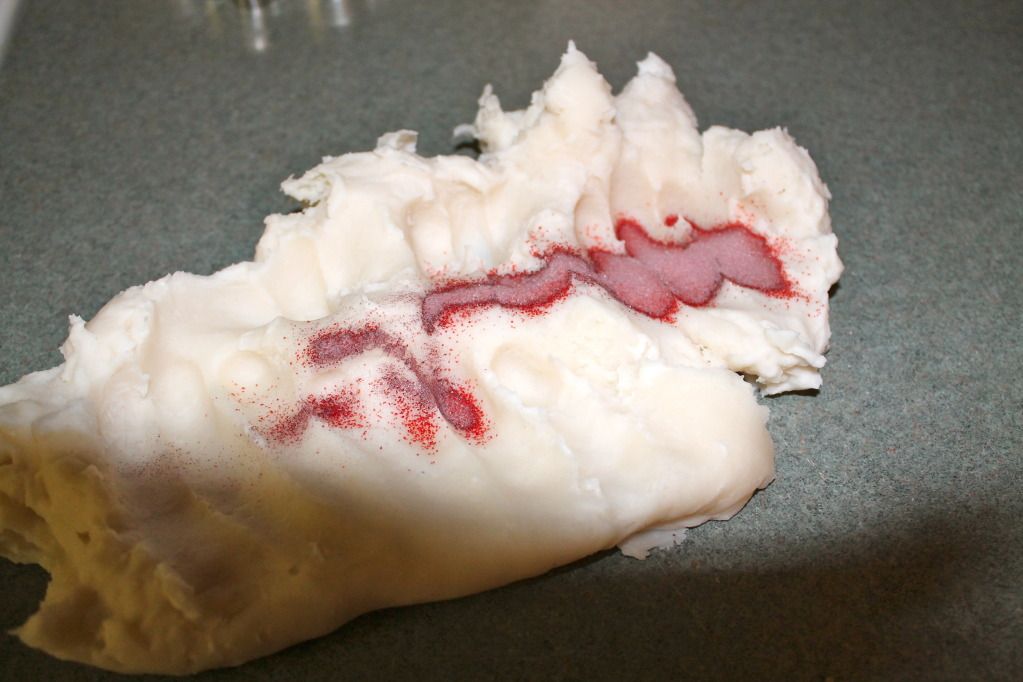
Dump onto counter or wax paper and knead, knead, knead the Kool-Aid into it.


Then watch little hands play.


And sometimes your kid will be so grateful that he'll make you a play dough heart and melt your heart.


Visit My Three Bittles for recipes, crafts + everything else in between!

Thursday, December 13, 2012

Teach Me Something Thursday, Volume Fifteen.


With holiday season in full swing + winter right around the corner [even though many of us already feel as if winter arrived back in November], there is nothing like a nice, hot meal to warm you up. For this installment of TMST, Roxy, the roller derby doll from grrfeisty has cooked up something insanely delicious - portobello + spinach penne pasta casserole [try saying that five times fast]. As we like to say in my crazy Italian family, mangia!

Hi all! I'm Roxy over at grrfeisty. I've decided to share one of my favorite meals with you on Teach Me Something Thursday. :) As far as total time to consumption.. I'd say almost an hour. But the leftovers heat up real quick and taste great for days! Not too shabby. :) I usually whip it up before heading out to roller derby practice. Dinner that night and lunch the next day!


1. Preheat oven to 350 degrees F.
2. Lightly grease 9x13 inch pan.
3. Boil pasta for 8 - 10 minutes [I add a bit of salt and olive oil to the water].
4. As the water boils, put vegetable oil into a saucepan, along with your mushrooms. Cook for a few minutes, until yummy mushroom smell is wafting around your kitchen. And then set aside.

5. Melt olive oil spread in saucepan & mix the garlic, flour, and basil. Gradually add the milk. Stir in 1 cup of mozzarella cheese until melted.
6. Mix in pasta, spinach, mushrooms, and soy sauce.
7. Transfer to baking dish and cover with remaining cup of cheese. [Add more if you want!]
8. Bake for 20 minutes, or until bubbly and/or light brown. :)


Let me know if you give it a try - I'd love to hear about any edits! I think sautéed onions would make it even yummier.

For more delicious recipes, crafts + DIY projects from this multi-faceted math teacher, swing by grrfeisty + be sure to say hello!

Thursday, November 29, 2012

Teach Me Something Thursday, Volume Thirteen.


The thirteenth installment of TMST is a veg-friendly spin on one of my favorite foods - tacos! Allie, from the awesome blog, Beauty + the Feast, shows us how to make these meatless treats with nuts. Yes, you read that right. These tacos can be made vegan or vegetarian, its up to you. Print out the recipe card to see what you'll need for the "meat" + head to the store to snag all of the usual suspects [tortillas, favorite cheese blend, veggies, etc.]. Enjoy!

Hi, short girl, long island. readers! I'm Allie and I blog over at Beauty and the Feast (you should come on by and say hello)! Today I am here to teach you all how to make "nutty tacos," a great and healthy vegetarian taco alternative. Full of protein, these tacos will surprise the biggest meat eater... I promise!


Don't forget to head over to Beauty + the Feast for more fantastic recipes + other treats!

Thursday, August 16, 2012

Lazy Root Beer Float!

This post is live, from my kitchen. Sure, there will be a bit of a time delay by the time it posts, but this is as close to real-time as I'll get (until I decide to be brave and vlog). I keep eyeing the IBC Root Beer in the fridge, but I'm craving something more than that. The ice cream flavors in the freezer aren't really my cup of tea, but there ARE ice cream bars. Vanilla ice cream with a chocolate shell. Simple, yet delicious. So, I've decided to experiment with what I am calling a Lazy Root Beer Float.

Lazy Root Beer Float
1 bottle IBC root beer
1 ice cream bar (whatever brand/flavor you like)
1 tall glass
1 straw
1 spoon

Now, before you start gathering the goods, get a nice tall glass and toss it in the freezer, along with the root beer. Leave them in there for ten to fifteen minutes before you do anything - just don't forget them in there!


Once your ready, unwrap your ice cream bar, and place stick side up in your glass.


Add root beer, but leave a few inches at the top of the glass. Dunk ice cream bar up and down a bit to mix. Be careful, it'll foam up a bit. Once the ice cream starts to fall of the stick, mix with the stick.


When its ready, stick a straw in and start sipping! Now, please excuse me while I stuff my face and wait for my photos to upload from my phone. 


Seeing as I was uploading the pictures without wifi, it took a considerable amount of time. I'm already finished with my float, and added the spoon as one of the things you need. Why, you might ask? Well, you're going to have chunks of chocolate at the bottom of the glass. Seeing as its a crime in this part of town to waste perfectly good chocolate, I scooped it out and ate it! Is was super crunchy and delicious. Mmmmm, chocolate.


What are some quick concoctions you've thought of lately? Are you more of a sweet or savory snacker?

Tuesday, August 14, 2012

Coconut Butter + Chocolate = Candy!

Last week, I got lots of fun stuff in the mail. Postcards and letters from pen pals, fancy postcards to send to said pen pals, and a boatload of nut butters from Artisana. I have purchased their cashew butter and Cacao Bliss in the past and loved it, but had not tried many of their other products. They graciously sent me over lots of goodies to try.


Now, I have had ample time to try all of the nut butters they sent me. I picked up a slew of apples and bananas to snack on at work. Between phone calls, I would squeeze a bit on my fruit and take a bite. Super convenient and not messy whatsoever. I really liked their almond butter, and really dug the macadamia butter - it has teeny tiny bits of macadamia nuts in it, which made the texture awesome. I didn't dislike the pecan or walnut butters, but they weren't my favorite of the bunch. I've never really been a fan of either nut, which probably has to do with this. When I was younger, we would have mixed nuts in a wooden bowl on the table. The pecans and walnuts were always my least favorite. Apparently, not much has changed over the years. So, if you like walnuts and pecans, I have a feeling you will like the pecan and walnut butter. 

I used the coconut oil as a moisturizer on my arms and legs after my shower, and it worked wonders. No, this isn't the first time I've done this. If you haven't tried this, I suggest you do (unless you're allergic, then stay away). Next trip I take, I will definitely grab a few of these packets for travel - I wouldn't dare take my jar of coconut oil with me. With my luck, I wouldn't close the jar completely, and it would be a disaster, to say the least. I ate the Cacao Bliss straight out of the package, because its just that delicious. 

 Now, I needed to do something awesome with the coconut butter. I was craving candy when I was mixing the jar, so I decided to chop up little bits of chocolate, mix it with the coconut butter, then freeze it for about then minutes. This took all of fifteen minutes to do, including mixing the settled coconut butter. 

Chocolate Coconut Butter Candies
3 ounces Artisana coconut butter, mixed thoroughly
1/4 ounce chocolate of your choice, roughly chopped (I used Raaka's Dark Chocolate with Sea Salt)
Ice cube mold (or a candy mold, whatever floats your boat)

Step one: mix your coconut butter - make sure its not separated. Like natural peanut butter, this will also have naturally occurring separation of oil and solids.


Step two: chop your chocolate. I chose this chocolate because I figured the sea salt would be a nice touch to the sweetness, and I was so right. Its not strong, but it adds a nice depth to the flavors. You can use whatever chocolate you have on hand. I'm sure it will be delicious any way you make it!


 Step three: put a few bits of chocolate into the bottom of your mold. Scoop a bit of coconut butter into your ice cube tray or candy mold. Make sure to tap the tray or mold lightly (I stress lightly, because you don't want to make a mess - can you tell I've been down this road before?), so remove air bubbles. Place a few pieces of chocolate on the coconut butter. Finish filling the mold with coconut butter, and sprinkle a bit more chocolate on the top. You don't have to put a lot of chocolate, unless you want to. I just put a pinch each time, because I wanted to incorporate it, without mixing it in with a spoon.


Step four: place your tray/mold in the freezer for about ten minutes. Remove and toss in the fridge until you're ready to pop the candies out. I left mine in for about thirty minutes, then transferred them into a wooden bowl. They've been in there for a couple days, and they still taste delicious. I used one of my awesome dinosaur ice cube trays to make these fun, but as I mentioned before, use whatever you have lying around.


My first experience with coconut butter was yummy. If any of you have ways to use your coconut butter in the kitchen, let me know! I'd love to experiment with the rest of the jar!

Wednesday, April 18, 2012

Chocolate Peanut Butter Iced Coffee!

Last week, I finally ordered PB2, a powdered peanut butter that I've had my eye on for nearly two years. I had an Amazon gift card itching to be used, so I figured I'd buy some healthy snacks. I snagged both the regular PB2 and the Chocolate version. 


I decided to try PB2 because when I consume peanut butter, its always more than one serving. Seeing as its pretty high in fat and sugar, I haven't had it in ages. In a nutshell (no pun intended), PB2 is low-fat peanut butter that you make as you need. Since I got the jars last week, I've used the chocolate peanut butter the most, but they're both equally delicious. I've had it at least twice per day, with apples or just eaten out of a dish. For 45 calories per serving, you can't really go wrong. 


Last night, I had an epiphany. As I noshed on my post run snack (two small granny smith apples and a serving of Chocolate PB2), my inner fat child needed a second serving to finish with my apple. After I finished my apple, I had most of the PB2 left in the bowl. As I took a sip of my iced coffee, to wash the peanut butter down, I realized that these two beauties would make a killer combo! So, after experimenting last night, here is my recipe. Its healthier than using sugary syrups, which are empty calories. The PB2 adds some nutritional value to your iced coffee.


Chocolate Peanut Butter Iced Coffee
2 tbsp Chocolate Peanut Butter PB2, mixed with 1 tbsp room temperature water
12 ounces iced coffee with your choice of milk (whatever coffee to milk ratio you prefer, just have 12 ounces of both liquids)
ice


Or, if you are too lazy to make your own iced coffee...


A16 ounce iced coffee from your local coffee shop will work - the ice takes up a decent portion of the cup, which is why I am telling you to go for the 16 ounce drink.


Step 1:
In a bowl, combine the PB2 and water. Stir until there are no lumps. 


Step 2:
Combine iced coffee, milk, and ice. Give a quick stir. If you bought your iced coffee, step two was done for you by a precious barista - make sure you tip them and say thank you!


Step 3:
Pour PB2 into iced coffee and stir.


Step 4:
Drink, and thank the heavens for my inner fat child creating this delicious concoction.


If you feel that this isn't sweet enough, then mix some more PB2 with water, then add it to your iced coffee. I'm going to make a drink with the plain PB2 tonight. I'm sure it will be delicious!


Wednesday, April 4, 2012

Chobani Giveaway Is Finally Here!

Last month, I received a case of yogurt from one of my favorite companies, Chobani. I had a lot of fun trying out new flavors and coming up with fun creations. I made frozen yogurt niblets, a killer salad, lemon raspberry popsicles, and a plethora of parfaits.


I had mentioned there would be a giveaway, and it has finally arrived! I am giving away one case of Chobani (assorted flavors) to one lucky reader!


To enter:
Follow short girl, long island. via Bloglovin' or Google Friend Connect, and leave a comment, telling me what is your favorite way to eat your yogurt. If you have a recipe you'd like to share, that would be awesome! Be sure to include your name and email address.


Bonus entries (up to four):
Like short girl, long island. on Facebook
Like Chobani on Facebook
Follow Chobani on Twitter

Follow short girl, long island. on Twitter and tweet about the contest, using this tweet: 
"Check out the @chobani giveaway @stellarmichele is holding over at short girl, long island.: http://www.shortgirllongisland.com/2012/04/chobani-giveaway-is-finally-here.html"


Now, for any extra entries you complete, you must post each in a separate comment. If you put them all into one comment, they will not count. Be sure to include your name and email address, blog link or twitter name in all of your comments, so I can reach you if you are the winner.


Contest ends April 15, 2012 at 11:59p, EST. Winner will be notified via email or twitter and will have forty-eight hours to respond.

Wednesday, March 28, 2012

Treat Yourself!


This weekend, I decided I was going to try and eat even healthier than I have been. My friend, Niko, is a personal trainer, and said that I might be eating too much sugar. Between the soymilk in my coffee drinks, my yogurts, frozen yogurt, snacks, and even the fruit I have been consuming, I needed to cut it down somehow. When I went grocery shopping, I bought lots of fish, tofu, nuts, and vegetables. I started drinking my iced coffee black with a sprinkle of cinnamon powder. I cut down my fruit consumption to one piece per day, and upped my vegetable intake. I also cut down on the junk food, yogurt, and frozen yogurt. Today wasn’t the best in the sugar department, though. I had a Chobani 0% Vanilla with a crumbled Thin Mint mixed in, and I had frozen yogurt for dinner. I’ve done worse damage before, so I’m not going to cry about it. Plus, I ran yesterday, and ate super healthy all day. Like Tom and Donna said on Parks and Recreation – treat yourself! Moderation is super important, at least for me.

Vanilla yogurt + Thin Mints = L-O-V-E.

Toppings on my frozen yogurt is rarity and a treat.
Photo from last week -  no toppings for me tonight!
Dole for days.
Lots of crunchy snacks, perfect to pair with hummus.
I did well in the grocery store! Lots of healthy snacks.


On Monday, I cooked a few staple items to get me through the first half of the week. I made some quinoa, tofu stir-fry scramble, chunky tomato sauce, sautéed spinach, and sautéed mushrooms with onions. I am not a fan of being a slave to the kitchen on a daily basis – I’d much rather spend four hours in the kitchen, twice a week, prepping and cooking. Here is one of the items I concocted this week. 


Tofu Stir-Fry Scramble
1 package firm tofu
½ cup Newman’s Own Low Fat Sesame Ginger Salad Dressing
1 tbsp + 1 tsp Sesame Oil
1 red pepper, sliced and cut into nice-sized pieces
½ pound broccoli, cut into nice-sized pieces
2 cloves garlic, chopped

First, press water out of the tofu. The easiest way is to wrap the tofu in paper towels, and place a heavy plate on top. I change the paper towels about three times, in order to soak up as much water as possible. I then cut the tofu into 1.5-inch cubes, and place in a glass dish with a lid. I pour the salad dressing on as the marinade. Put the lid on your container, give a quick shake, and toss in the fridge for at least an hour. I left mine in for two.

I usually find something else to do in the kitchen while I wait for foods to marinate – slice my veggies, pull out proper cookware, and to create other items. I try to cook for a few days when I’m in the kitchen, that way everything is ready to go when hunger strikes.

About fifteen minutes before you want to pull the tofu out, toss a teaspoon of Sesame Oil into a pot. Toss the garlic in and turn the heat on. Once the garlic starts to simmer, toss in the peppers and broccoli, then cover. Turn the heat to low, and occasionally stir the ingredients around. I always toss my broccoli in right after I rinse and shake it off, so the water in the florets and the juices in the peppers help everything steam. After about five minutes or so, you don’t see any steam action, toss in a tablespoon or two of water, and stir your vegetables. This should do the trick. Once the vegetables start to get soft, turn the heat off and remove the lid.

In a large frying pan, add a tablespoon of Sesame Oil. Let the oil heat up, and then carefully add the tofu. Cover the tofu with the oil, and move everything around. I didn’t want chunks of fried tofu, I just wanted to incorporate a bit more flavor into the tofu, and I figured this would be a nice way to do that. Once most of the oil is absorbed, toss the vegetables in and incorporate all ingredients. Remove pan from heat and serve.

I some alone, and then tried it on top on quinoa. I liked it both ways!

Tofu stir-fry scramble, so delicious!

What are some healthy recipes that you enjoy making?