Last week, I was introduced to Invaluable's #GotArt project + was asked where I find art that moves me. I thought about my recent art purchases, projects + galleries I want to explore - the one thing they all had in common was finding them via Instagram.
galleries1988
Gallery 1988 has two locations in LA, which are on my list of must-sees for my next Cali adventure. I snagged this awesome Joey Spiotto print last year, but had almost missed it due to such small runs of prints being made. If I hadn't scrolled through my Instagram feed, I wouldn't have seen the post about the prints going live on the site. I've also discovered an array of artists through Gallery 1988 over the course of time.
100soft
Truck Torrence is the dude behind 100% Soft. I'm a pop culture junkie who digs kawaii art, so when I discovered him I was stoked. Torrence has a solo show running at Gallery 1988 East this month [February 6 - 28]. Prints from the show are available online in limited quantities.
nimasprout
Nicole Gustafsson is another artist I discovered via Gallery 1988. I saw her "I'm a 90's Girl" painting from her Pop Terrariums show + fell in love. That piece is my entire youth in a nutshell, complete with a watermelon Ring Pop + a slice of pizza. The rest of her work is pretty fantastic as well.
taramcpherson
I discovered Tara McPherson back in 2006 via JapanLA, due to my obsession with tokidoki. My only McPherson art is in the form of a camera, which adorns a bookshelf with other artsy trinkets. McPherson not only kills it on canvas, she's also created some solid gig posters in the past.
thecottoncandymachine
Cotton Candy Machine is Tara McPherson's art boutique located in Brooklyn, which sells art, books, toys + also houses art shows. Some of my favorites [Buff Monster, Daniel Danger] are included in her collections, so adventuring here is a must for me this year.
Showing posts with label art. Show all posts
Friday, February 13, 2015
Thursday, July 18, 2013
Warm Body.
Last year, a friend of mine mentioned they were working on a solo project, but with madness swirling around, I didn't get to sit down and listen to any of it until Memorial Day weekend [worst friend ever, I know]. As I drove eastbound on the LIE, I sampled the tunes, wondering why I hadn't listened beforehand.
Warm Body is the brainchild of Long Island-based musician Ryan Foster [Toons, Lights Resolve, lost boy ?]. In 2010, Foster released the five-track EP extra warm, which is what I listened to on my drive home [although listening with a quality pair of headphones is recommended]. I actually listened a few times in a row, because I was amazed at what I was listening to [also, I felt like a horrible person for not realizing how insanely talented my friend is].
The EP opens up with "Touching Tongues," which if you were to ask me what floating through space + on clouds feels like, it
would be this song. Whimsical. Ethereal. Excellent song to set the tone for the tracks to follow. "Like Puns" is one of my favorites, thanks to the perfect blend of pop + rock with a touch of grit [not to mention it immediately reminded me of Canadian rockers Sloan]. "Newcomer" immediately sent my brain swirling, channelling Sgt. Pepper’s era Beatles, Sofia Coppola flicks + Twin Peaks. Just listen to it, because no matter how I describe it, I won’t be able
to do it justice. If you grew up in the 90s, "Swim Swam Swum" will definitely warm you up with some grunge-like nostalgia. The EP closes with "Million," which is super creepy, but in the best sense of the word. Think Are
You Afraid of the Dark? meets Goosebumps.
On December 12, 2012 at 12:12p, Foster released Twelves, which contains twelve songs written + recorded [on an iPad] in a time span of twelve days. The cover art was also created within the time frame as well. When we discussed the
time frame that was set, Foster explained that he wanted a challenge. He mentioned that due to time constraints and using an alternative medium for recording, it isn't his greatest recorded work, but for what it is, I think its pretty amazing. Some of my favorite tracks are “Our Love Will Live Forever,” “Water on the Moon,” “One for
the Weekend!” + “Goblins.”
You can snag extra warm + Twelves by naming your own price, but spend a couple bucks if you can spare it - it's important to support local artists! Don't forget to stay up-to-date on new tracks + tour dates via Facebook + MySpace.
Thursday, January 3, 2013
Teach Me Something Thursday, Volume Eighteen.
Welcome to the first TMST of the new year! The eighteenth installment is from Amber, the blogger behind My Three Bittles. Amber teaches us how to make play dough from ingredients sitting in your pantry! This is an excellent activity to develop fine motor skills in little ones [the teacher in me HAD to tell you that].
Hey guys, I'm Amber of My Three Bittles
and today I'm going to teach you how to make play dough! YAY!!!!My kids got so super excited about this and
spent FOREVER playing with it. So, let's make some play dough, shall we?!
Yes. I think we shall. It's QUITE simple really, but I've been in
such a "let's share" mood lately, that I thought I'd photograph the
process and share with y'all.
So here we go:
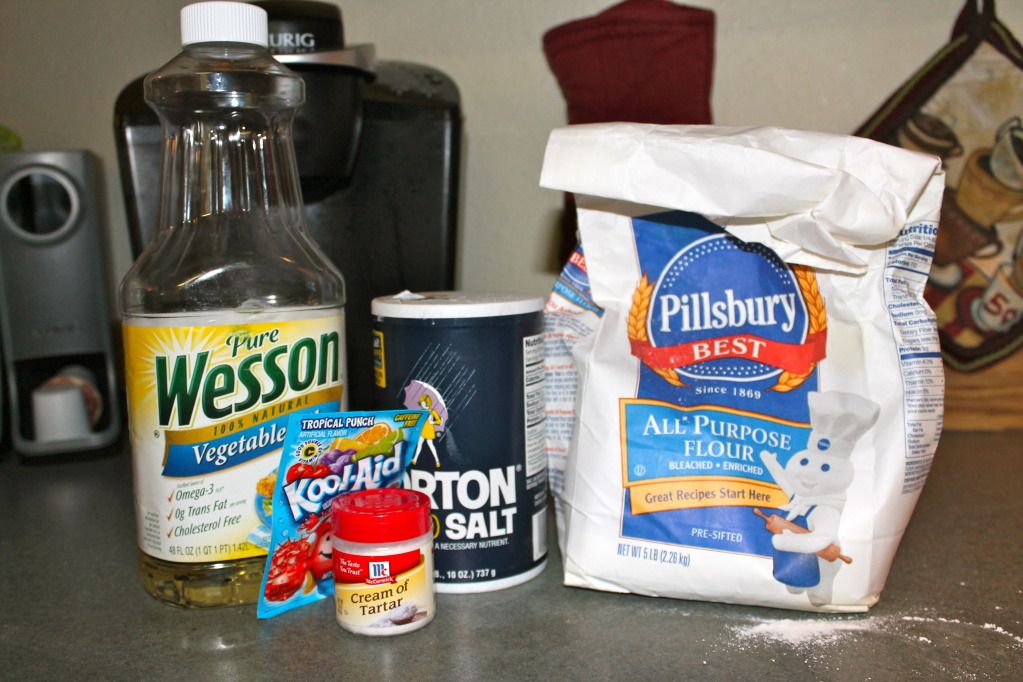
You'll need:
1 c. flour
1/2 c. salt
1 tbsp. cooking oil
2 tsp. cream of tartar
1 pkg. unsweetened Kool-Aid
1 c. water
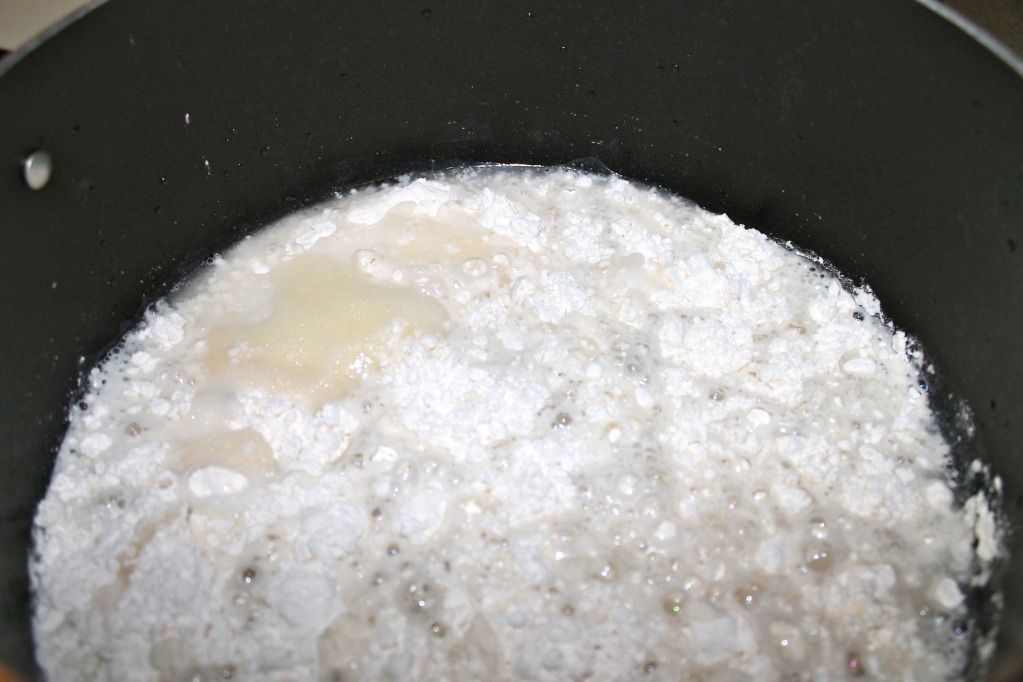
Go on and mix up your dry ingredients into your pot. Then add the oil and water.
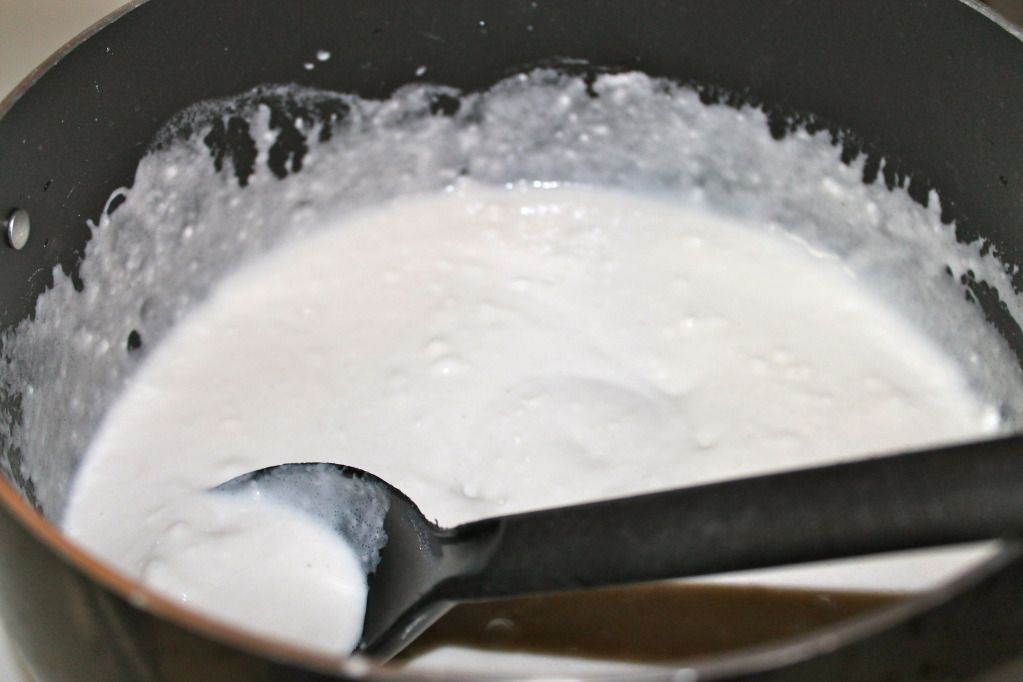
Cook over medium heat until mixture forms a ball.
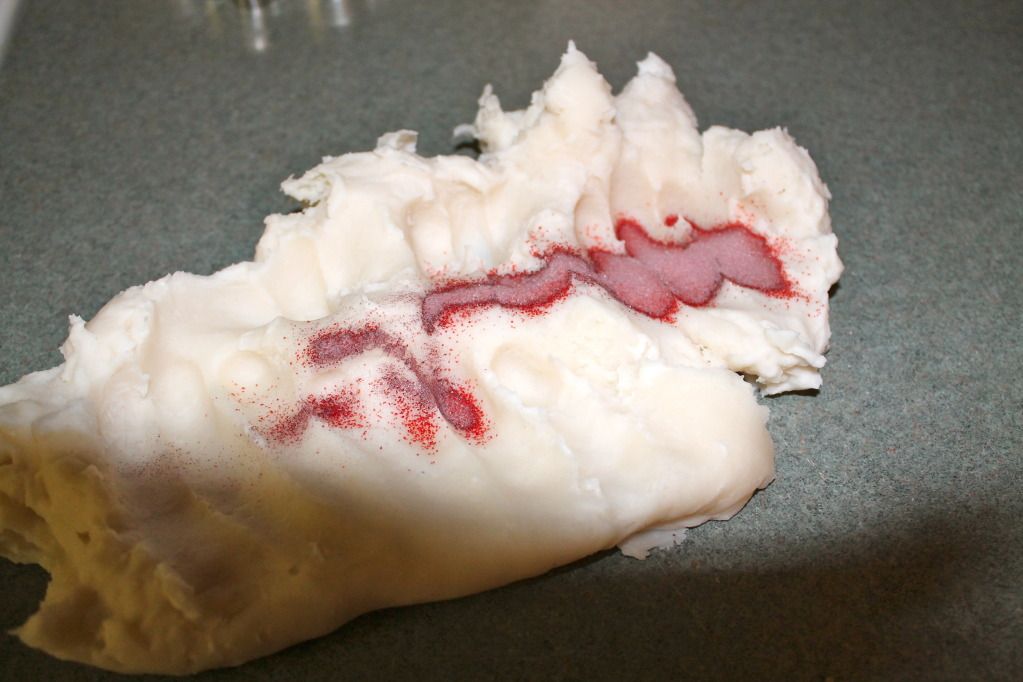
Dump onto counter or wax paper and
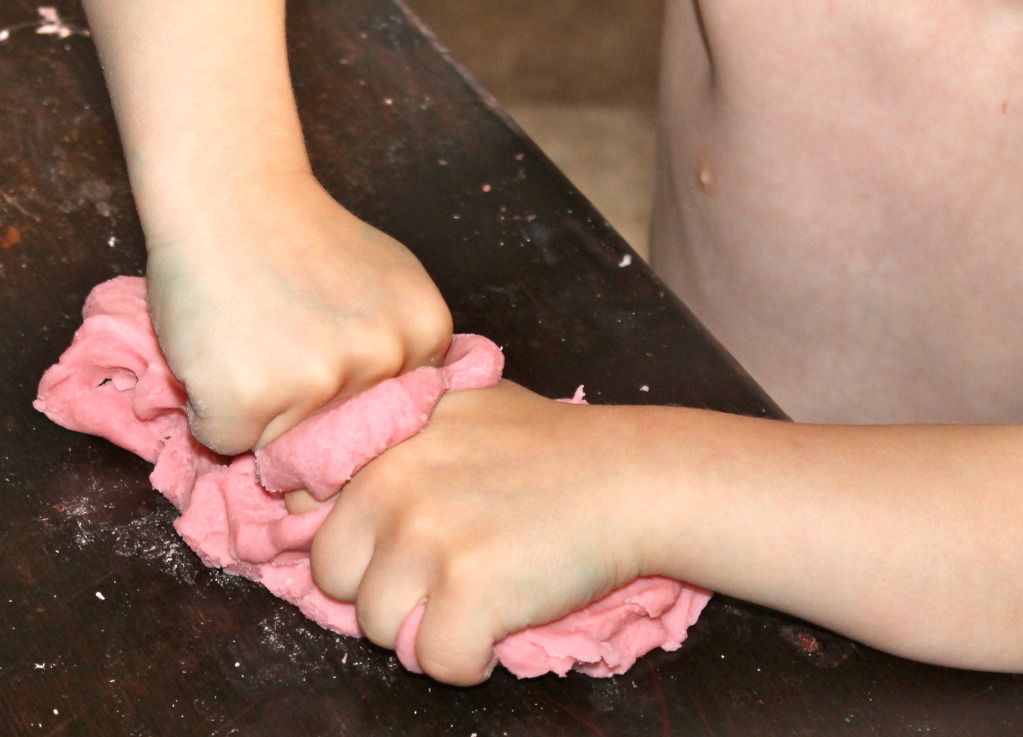
knead, knead, knead the Kool-Aid into it.
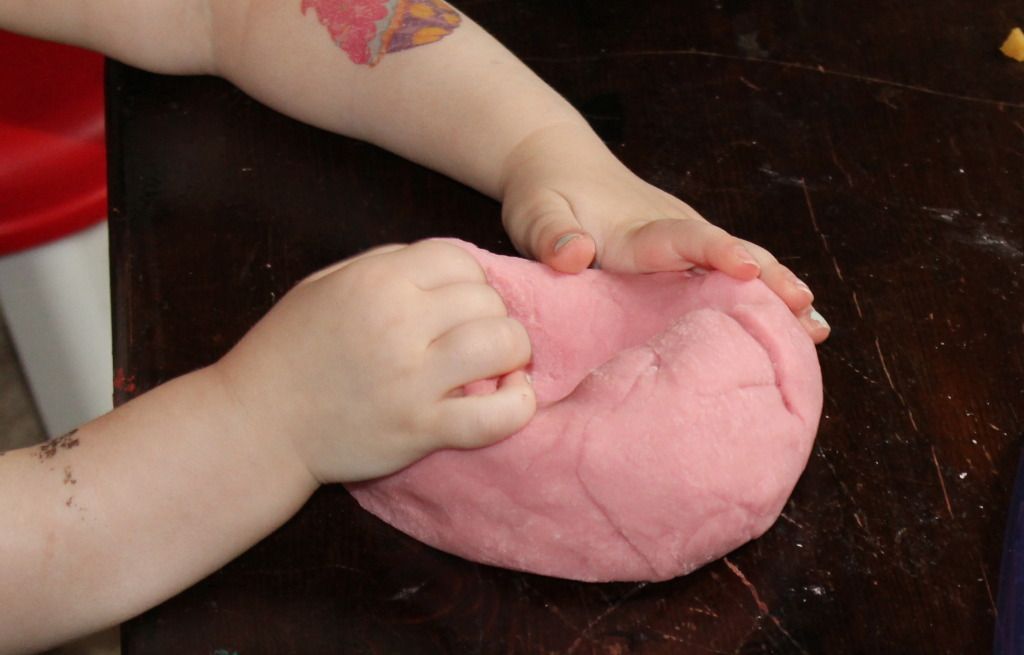
Then watch little hands play.
And sometimes your kid will be so grateful
that he'll make you a play dough heart and melt your heart.
Visit My Three Bittles for recipes, crafts + everything else in between!
Thursday, September 27, 2012
Teach Me Something Thursday, Volume Four.
The fourth post in the TMST series comes from my friend, Lauren. She has been making killer nail art for quite some time, + I asked her to create something special for the blog. Lauren is going to teach us how to create an ikat pattern nail art manicure!
This nail art tutorial is for an ikat pattern nail
art manicure. Ikats are patterned textiles and fabrics produced by
tying and resist-dying threads before weaving, similar in process to tie-dying.
Ikat nail designs are fun and easy to do and you can use just about any
colors. Also, this mani is great because it doesn't have to be perfect! This
is always a plus, especially when trying to paint your non-dominant hand. When
doing an ikat pattern, I personally prefer to use bright contrasting colors but
neutrals will work too. The options are endless!
Suggested
materials:
ANY brand is fine, but I will tell you which brands
and colors I am using for this particular mani
• Base coat - Seche Clear
• Top coat - Seche Vite, which is very
quick drying and super shiny
• White nail polish - Sally Hansen
Insta-Dry in "Whirlwind White"
• Black nail striper - Kiss brand
Brush-On Nail Art Paint striper "Black"
• 2 different colored nail
polishes, a base color & an accent - China Glaze "Turned Up
Turquoise" as the base color, Sinful Colors "Fusion Neon"
as the pink accent color
• A clean, small paintbrush or cotton swabs,
for cleaning the cuticles afterwards (optional)
• Nail polish remover (optional)
Before
you begin painting your design:
These steps are totally optional, but definitely
recommended!
• Put down some paper towels on your work
area, in case of any spills.
• Be sure to remove any old nail
polish.
• Gently file nails into desired shape and
remove any deep ridges with a buffer
• Push back cuticles with a cuticle pusher
or orange wood stick and trim if desired.
• Put down some paper towels on your work
area, in case of any spills.
• To make things easier to find (and because
I'm super neurotic) I always set up my polishes in the order that they will be
used.
• Apply a base coat to protect from
potential staining from color polish; wait for it to dry completely.
Step
1:
Apply 2 coats of the base color and allow to dry.
It is important to allow all polish to dry before
applying a different one over it, otherwise the colors will bleed.
Step
2:
Apply the white polish in an oval-type shape. It
doesn't have to be perfect, just a general oval.
It is better to make the ovals going up and down
the nail, instead of across, because you will run out of room.
Try not to keep too much polish on the brush,
because you don't want the color to accidentally drip on the nail in a spot
that doesn't look good.
Wait for the white to dry.
Step 3:
Apply the accent color over the white ovals. This
can be done any way you'd like. You can leave more white showing or less,
it's up to you!
Paint the accent color in a similar fashion as the
white, not using too much polish on the brush to avoid drips.
For the sake of variety, on some ovals I did a
smaller oval-ish blob in the middle, others I did 3 smaller blobs and some I
made a C or G shape.
As always, let it dry!
Step
4:
Using the black striper, begin to paint multiple
thin lines lengthwise, thus creating a border on the white ovals.
Don't worry if your lines aren't perfect and the
same length.. varying and imperfect lines actually look better and more
"textured" and fabric-like!
Personally, I found that starting with the longer
lines on the side of the ovals was easier to get the desired shape.
The side edge borders can be as thick or thin as
you'd like, just paint more or less lines.
Step
5:
Once the 2 longer sides are done, paint shorter
lines lengthwise, very close together until you've made lines all the way
across the top and bottom.
As in step 4, varying lengths look better than
using the same length line over and over.
You can make your end borders as short or long as
you'd like, just by painting shorter or longer lines.
Step
6:
Using the black striper again, and in the same
manner as the border, paint thin lines lengthwise somewhere in the center of
the oval.
This will create an imperfect center dot. The
center dot can be as big or small as you'd like and it doesn't have to be
perfectly centered.
Allow to fully dry, and apply top coat.
Step
7:
This step is completely optional, but if you are as
neurotic as I am, it will help achieve that perfect neat manicure.
You can use either a small paintbrush or cotton
swab, dip it in nail polish remover, and use it to erase any excess polish on
your cuticles and skin.
Be careful not to use too much remover, otherwise
you will risk ruining your design. If you opt for the brush, be sure to
use brushstrokes in the same direction, don't "swish" the brush
around, it tends to spread the excess polish rather than remove it.
And that's it! I hope this tutorial has
inspired you to try ikat patterned nail art!
Check out more of Lauren's awesome nail art on Instagram + her brand-new blog, Bad Luck Barbie.
Tuesday, August 21, 2012
Blogger Craft Night!
Last night, I met up with Sarina, the gal behind the awesome blog, Nerd Craft Librarian. Now, we were both connected in numerous ways, but hadn't officially met until yesterday. Sarina went to high school with my brother, Vinnie, and I went to kindergarten with her brother, Charlie. Also an interesting fact: in kindergarten, I tried kissing Charlie on the school bus (I was very forward, even at the tender age of five). The bus stopped short and Charlie fell, which gave him a pretty gnarly gash, and I'm pretty sure he had to get stitches. At his birthday party, which I want to say was at a bowling alley (I'm trying to remember 25 years ago, so bear with me), I was saying goodbye and I was afraid to hug him (I hugged all of my friends, and actually contracted mono from a girl I hugged who bit my face. No bath salts, just a girl who hated hugs), but our moms said I wouldn't hurt him by hugging him.
We hit it off right away, and Sarina gave me a tour of their awesome new house before we got to work in the craft room. Yes, she has a craft room, and it rules. I had brought over supplies to make tile coasters, and Sarina was going to teach me the ways of using freezer paper to make a stencil for a tote bag I had. Our first project we embarked on were the coasters. Here is a quick tutorial on how we did this.
Tile Coasters
4" x 4" tiles - purchased 5 at The Home Depot for under $1
Paper/fabric (we used stationery, tissue paper, scrapbooking paper and a bag from The Wizarding World of Harry Potter)
Felt
Acrylic Sealer
1. Cut felt to be a bit smaller than your tile - don't want overhang. Glue to bottom of coaster BEFORE decorating. I did it after I started. It wasn't the end of the world, but it is wiser to get this taken care of first.
2. Figure out what you want to put on the coaster, paper/fabric-wise first. Lay the items out on the tile, before applying Mod Podge, so you can see if you like the layout.
3. Apply a thin coat of Mod Podge onto the tile with your foam brush, and start placing the paper on. Smooth down with your fingers. Once all of your pieces are on, apply a thin coat of Mod Podge on top. Let dry for 10-15 minutes. Repeat process twice.
4. Wait a few hours (or overnight, like I do), and use an acrylic sealer. It will make the coaster last longer, because the Mod Podge won't protect from water damage. Follow the directions on the sealer bottle, and apply at least three coats to your coasters. On my last batch, I applied half a dozen coats of sealer, over the course of two days. I'd rather be safe than sorry, especially since these will be used as gifts!
Regarding the freezer paper, Sarina be posting a tutorial soon, so make sure you bookmark her blog. If you want to see a larger step-by-step photos of her latest Halloween themed freezer paper project, click here. I'll tell you this, though - it was simple and awesome. Check out the bag I created below!
We took a crafting break, and my gracious host fed my hungry little behind homemade doughnut holes and Caprese salad, while we discussed our next crafting escapade. I seriously had so much fun last night. It was the first time I've actually hung out with a fellow blogger - crazy, right? But we definitely have more blogging and crafting projects up our sleeves for the future.
I also had to post this for you Dr. Who lovers out there. Sarina made this amazing TARDIS bag, which will be up in her Etsy store shortly.
Do any of you often have blogger meetups or crafting nights? If any bloggers on the island are reading this, let us know if you're interested in either. Its always fun meeting new people and making fun creations.
We hit it off right away, and Sarina gave me a tour of their awesome new house before we got to work in the craft room. Yes, she has a craft room, and it rules. I had brought over supplies to make tile coasters, and Sarina was going to teach me the ways of using freezer paper to make a stencil for a tote bag I had. Our first project we embarked on were the coasters. Here is a quick tutorial on how we did this.
Tile Coasters
4" x 4" tiles - purchased 5 at The Home Depot for under $1
Paper/fabric (we used stationery, tissue paper, scrapbooking paper and a bag from The Wizarding World of Harry Potter)
Felt
Glue gun or Tacky Glue
Foam BrushAcrylic Sealer
1. Cut felt to be a bit smaller than your tile - don't want overhang. Glue to bottom of coaster BEFORE decorating. I did it after I started. It wasn't the end of the world, but it is wiser to get this taken care of first.
2. Figure out what you want to put on the coaster, paper/fabric-wise first. Lay the items out on the tile, before applying Mod Podge, so you can see if you like the layout.
3. Apply a thin coat of Mod Podge onto the tile with your foam brush, and start placing the paper on. Smooth down with your fingers. Once all of your pieces are on, apply a thin coat of Mod Podge on top. Let dry for 10-15 minutes. Repeat process twice.
4. Wait a few hours (or overnight, like I do), and use an acrylic sealer. It will make the coaster last longer, because the Mod Podge won't protect from water damage. Follow the directions on the sealer bottle, and apply at least three coats to your coasters. On my last batch, I applied half a dozen coats of sealer, over the course of two days. I'd rather be safe than sorry, especially since these will be used as gifts!
Regarding the freezer paper, Sarina be posting a tutorial soon, so make sure you bookmark her blog. If you want to see a larger step-by-step photos of her latest Halloween themed freezer paper project, click here. I'll tell you this, though - it was simple and awesome. Check out the bag I created below!
I also had to post this for you Dr. Who lovers out there. Sarina made this amazing TARDIS bag, which will be up in her Etsy store shortly.
Do any of you often have blogger meetups or crafting nights? If any bloggers on the island are reading this, let us know if you're interested in either. Its always fun meeting new people and making fun creations.
Labels:
art,
bloggers,
coasters,
crafts,
creativity,
freezer paper,
harry potter,
lisa frank,
mod podge,
paint,
tile
Monday, August 20, 2012
An Afternoon with Eastern Phoebes.
I love when an interview can be unscripted and totally candid. Sometimes in this line of work, its not possible to do so, especially when questions are sent via email. When I'm given the chance to sit down and shoot the shit for awhile, its great. Its even better when the folks you're interviewing aren't total strangers! Last week, I got to meet up with Eastern Phoebes, a band hailing from the South Shore of Long Island. We discussed the band, life without the 'net, the upcoming EP and plans for their next video shoot.
The band is comprised of Ry Smith and Meg Bayley, who also happen to be the most adorable couple I've ever met. When they play live gigs, they are joined by friends Rick Katterman and Gary Norton. I've known Ry for years, but this was the first time I had met Meg, but I felt as if I'd known her for years after I left that afternoon. We conducted the interview at their lakefront cottage, which was fantastic. The beginning of our conversation was essentially Ry and I catching up on our lives as of late - we had met back in 2007, when he was performing with the band, Camera-Head Shark. We have had brief encounters in the last year or so, but we haven't had time to sit and chat in years. I knew that he had a new musical project going on, but I didn't find out about it until a couple months ago. I know, I'm a horrible friend - I should be up on these things. I had listened to Lion Gardiner, which the band released this year, and fell in love with it. There are so many elements and facets to their music. It makes you feel happy, but not in a cheesy sort of way. Do yourself a favor and put on a pair of headphones and just listen. Don't surf the 'net, leave the land of Instagram for the next hour, and lose yourself in the music. Its free (just enter your price as $0.00), although it wouldn't kill you to pay a few bucks for the album.
Lion Gardiner is the first full-length album created since the formation of Eastern Phoebes, but the band prefers recording EPs. Working for an LP for months on end is far more tedious than banging out an EP in around a month. In fact, their next EP, Better People, will be out this October. Ry worked on most of this while Meg spent the month in San Francisco, completing her yoga training. I got to hear a few rough cuts, and I am really digging what Ry had been working on while Meg was getting her Ohm on in California. Meg's vocals need to be added in, along with whatever else Ry sees fit, but trust me on this, its gonna be good. We spent a good chunk of the conversation discussing the upcoming video, which will be for "I'm a Wolf," a song which will be on Better People. I can't spare details, but from the ideas Ry and Meg are swirling around, it will definitely be spectacular.
As we sat in their sunroom, entertaining the pup, Penny Lane (yes, the same name as our cat), we discussed life and the lack of interaction we see between folks these days. It seems as if most people we know hide behind some sort of gadget, instead of going out and seeing the world. If most people we know go out to do something, the hot spot is almost always a bar, which is a scene that we really don't frequent much anymore. I'll be the first one to admit that I am totally guilty of zoning out on my computer (and my iPhone), but I do take time each day to spend time connecting with people and creating fun things. We all agreed that game nights are totally underrated and that we need to resurrect them, for the sake of humankind.
You can find Eastern Phoebes on Facebook, Twitter and make sure to download their tunes [for free] over at Bandcamp. For even more fun links to Meg's yoga journey + Ry's artwork, head over to Eastern Phoebes for the links.
Labels:
art,
eastern phoebes,
friends,
interview,
long island,
music,
yoga
Tuesday, March 27, 2012
Music Tuesday: Everybody Else
Back in my adventuring heyday, I was heavily involved in music, and I was really into the Los Angeles music scene at the time. This was back when Maroon 5 would be able to play a venue on Long Island, and walk around busy towns, virtually unnoticed. Yeah, that used to happen, even after Songs About Jane had been released by Octone Records. Wow, I feel really old right now.
I would often make trips out to California, to visit my friend Melissa. We would always hit up a handful of shows while I was out there, and even a few band practices. There were even a few bands that I would sell merch for when they were in the New York area. One of those bands, Everybody Else, is today's featured artist.
In 2002, their former bassist messaged me on Friendster (yes, Friendster - the grandfather of social networking sites), to tell me about the band they had just formed. Long story short, I fell in love with the EP. Ten years later, I am still listening to the band. Here is the video for First Class, which is off the album, Wanderlust, which was released in 2011.
If you like what you saw/heard, check them out on iTunes (my favorite songs are Always, Faker, Makeup, Soldier Without an Army and Without You. If you prefer a hard-copy of your music (which I do), you can purchase all of their albums and some custom merch here. Most of the artwork you'll see is made by their talented singer/guitarist, Carrick Moore Gerety. Support independent artists!
I would often make trips out to California, to visit my friend Melissa. We would always hit up a handful of shows while I was out there, and even a few band practices. There were even a few bands that I would sell merch for when they were in the New York area. One of those bands, Everybody Else, is today's featured artist.
In 2002, their former bassist messaged me on Friendster (yes, Friendster - the grandfather of social networking sites), to tell me about the band they had just formed. Long story short, I fell in love with the EP. Ten years later, I am still listening to the band. Here is the video for First Class, which is off the album, Wanderlust, which was released in 2011.
If you like what you saw/heard, check them out on iTunes (my favorite songs are Always, Faker, Makeup, Soldier Without an Army and Without You. If you prefer a hard-copy of your music (which I do), you can purchase all of their albums and some custom merch here. Most of the artwork you'll see is made by their talented singer/guitarist, Carrick Moore Gerety. Support independent artists!
![]() |
| 2004: Being silly + selling merch for Everybody Else at CBGB. |
Labels:
art,
california,
everybody else,
independent,
los angeles,
music,
video
Wednesday, February 15, 2012
My Favorite Four-Letter Word - SALE!
As mentioned in an earlier post, Dianna Hansson is my go-to style gal. She is running an awesome sale in her Etsy store this week - 40% off if you use the coupon code FRIEND. Mention that you found out from short girl, long island - the more readers that purchase, the bigger the giveaway we can do in March!
![]() |
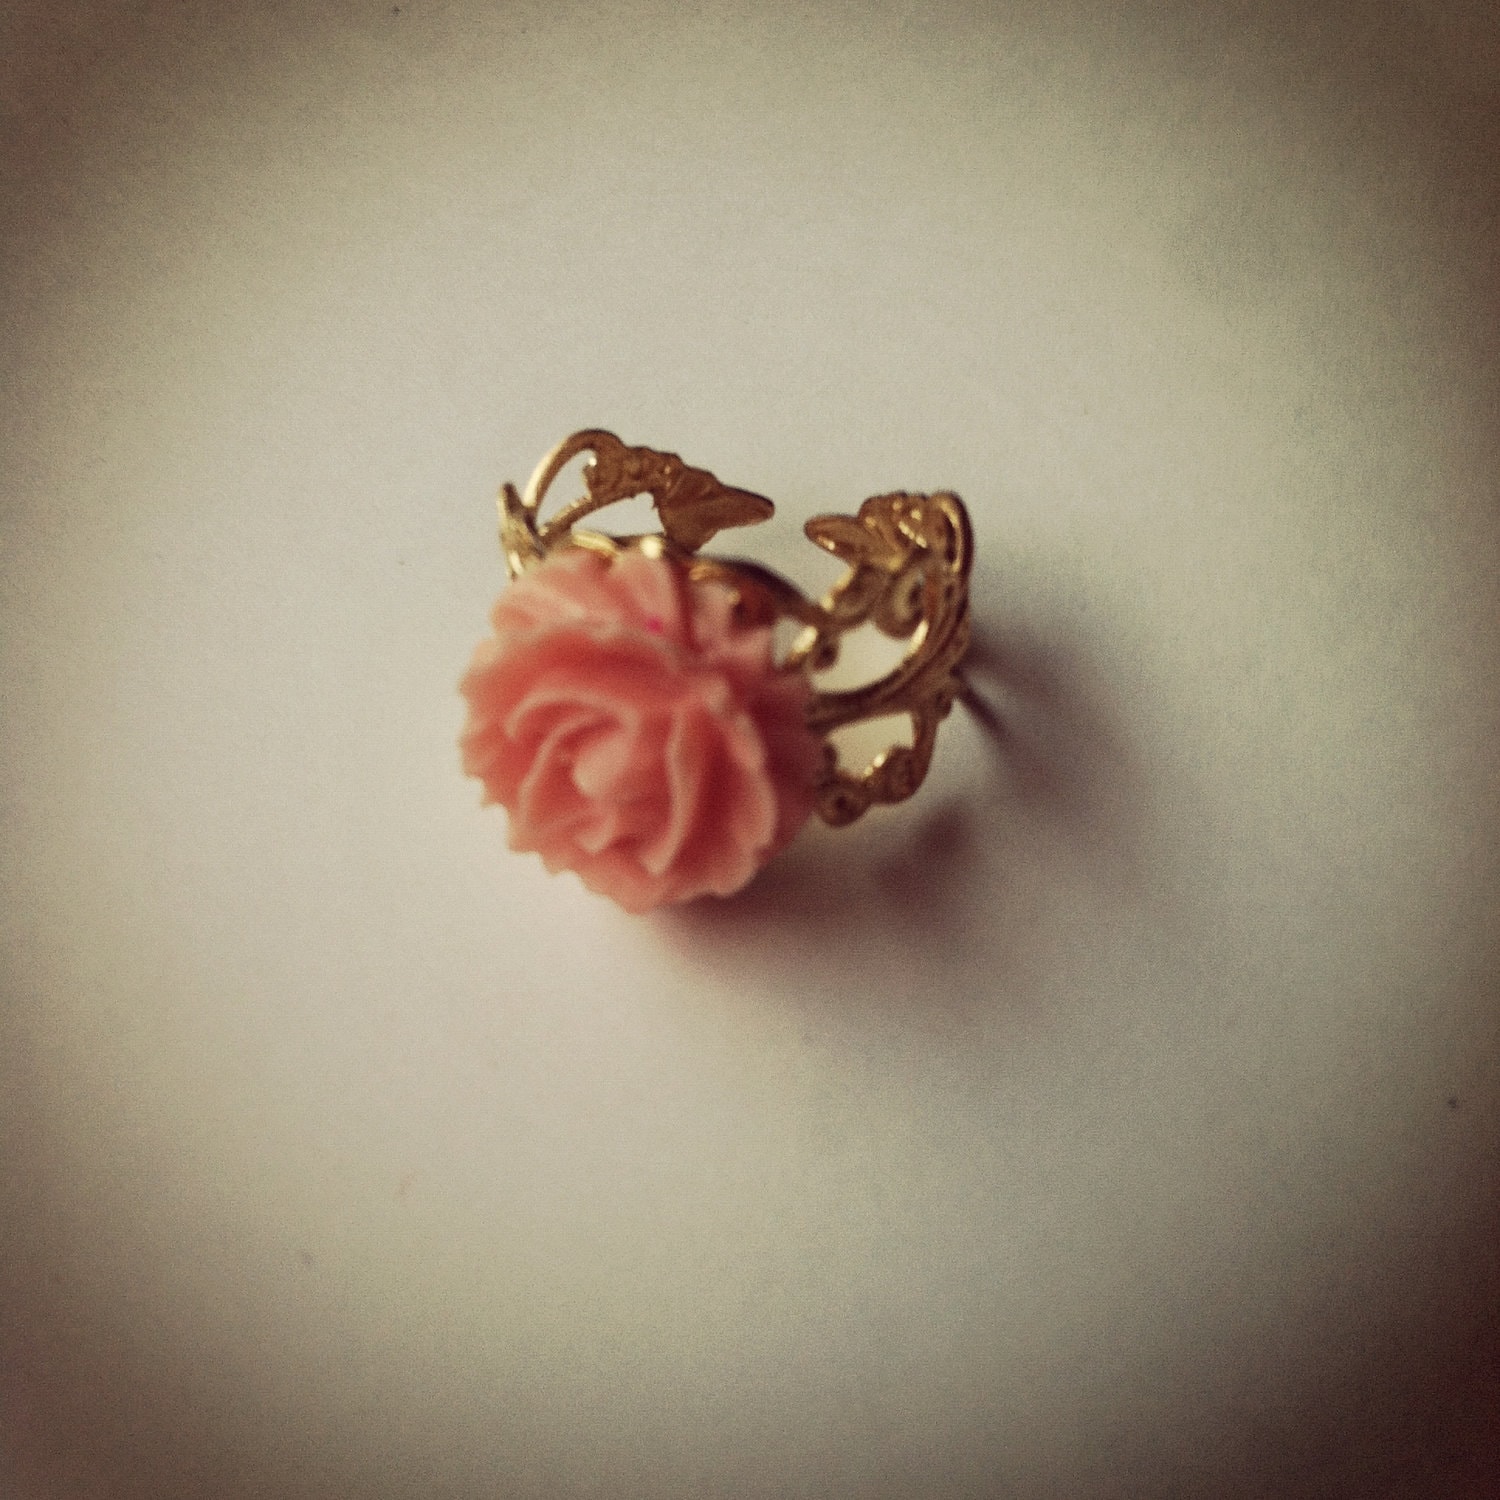
| Sweet Rose Ring, $8 |
![]() |
| Through The Looking Glass Necklace, $28 |
![]() |
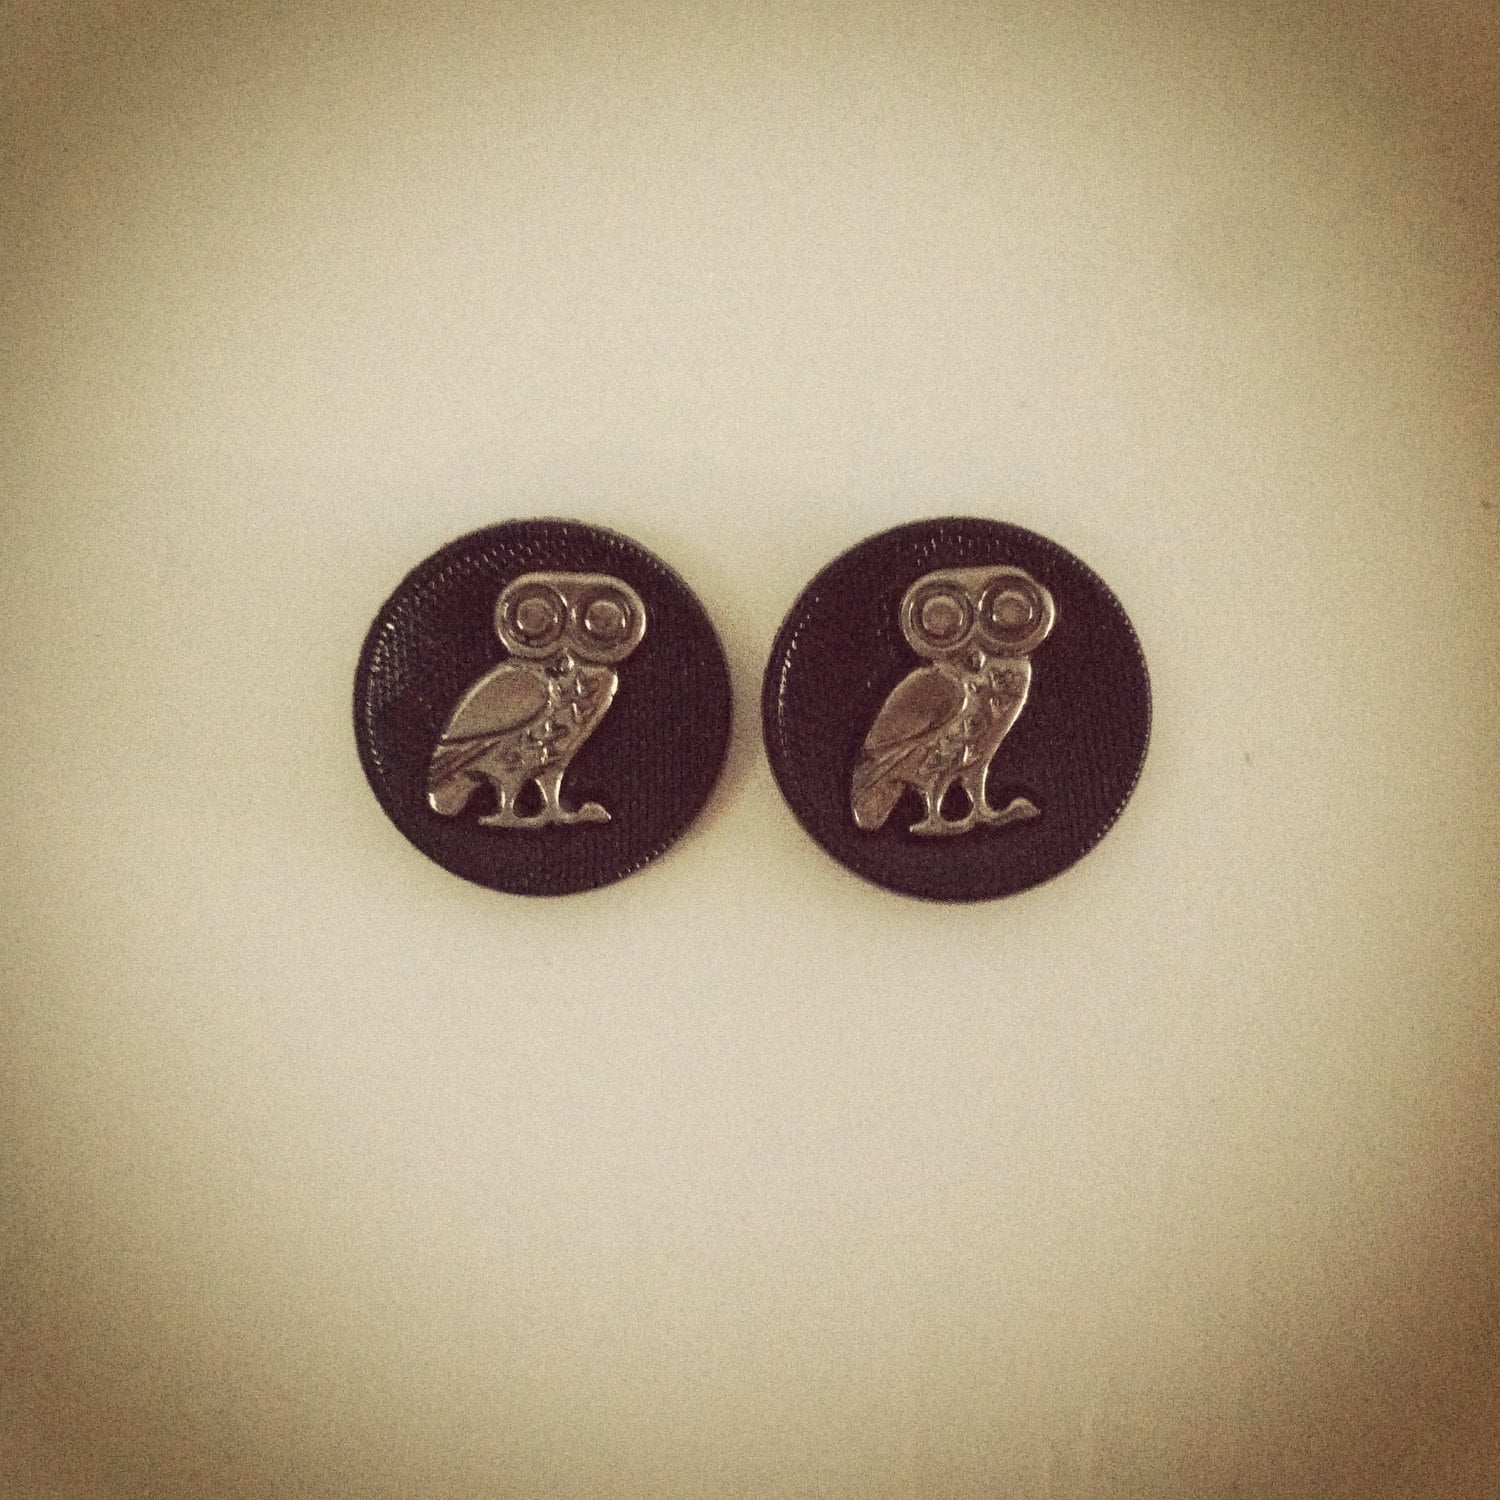
| Owl Studs, $16 |
Happy Shopping!
Michele
Tuesday, January 31, 2012
The Reincarnation of the Mix Tape.
When I was younger and wanted to create a mix of various music, there wasn't a MacBook or iTunes to turn to. I used my trusty Sony boom box, which housed two cassettes - fancy, huh? I would either tape off of the radio, or from one tape to another. I would sit in front of my largesse sound system for hours (the bigger the better - kindof how we viewed our hair back then), listening to the radio, waiting for the perfect song to come along.
Michele
This was no easy feat, if you remember. Timing was everything. No mix tape was perfect, which made it special. Some songs were cut off by a millisecond, or there was a few mumblings from an overenthusiastic DJ. Sometimes radio jingles unapologetically interrupted the final seconds of a tune. Almost every tape I made had one song that was cut off halfway through, because that side ran out of tape. Regardless, when receiving a mix tape, these flaws did not matter. Making a mix tape was work, like baking a cake or sewing a skirt. Time consuming, but worth it for the final product (even if it did have a few screw-ups). I'm not the only person who will back up the importance of mix tapes and youth - read some of the works by Rob Sheffield and Chuck Klosterman.
The artwork was also an integral part of the finished product. Listing tracks on the insert that came with the tape was just as important. The choice of ink, style of handwriting, general artwork and title of the tape were all integral components. I once made a tape in middle school that I titled "Yo Tengo Espiderman in Mis Pantalones" - yes, that roughly translates to I have Spider-Man in my Pants. How I came up with that title is beyond me, but I was one of those children who marched to the beat of her own drum.
With that said, I no longer make mix tapes. Along with the rest of the population, I use iTunes to create a mix. Its made in a fraction of the time, and it can utilized on your computer, iPod, iPhone, iPad or whatever other iDevices you utilize. Although, over the last few years, I barely even do that. With the constant upgrading of technology, I have only put about fifty albums on my new computer. The 1,000+ CDs at home have yet to be added, as it takes too much time.
Now wait, you'd think that since I'm unemployed that I could complete such a task! Well, in all honesty, uploading them can be a tedious process and I am not going to sit at my computer any more than I do at the moment. Maybe in the summer I'll do something with them. Lately, I have turned to Spotify, which has millions of songs uploaded on their servers, for my musical enjoyment.
One of my most recent playlists is called her royal midgeness revisits her youth. Not to toot my own horn, but its a small, yet decent collection of various artists I grew up listening to. There are no Beatles/Beatles members songs available on here, but that just might be because I have the free version (unemployed people can't spend money on cool things like Spotify), but I have a feeling it has to do with licensing. Either way, I'm not complaining! Its like a never-ending digital mix tape. I can add songs to it when I feel like it, which is nice. You can make a plethora of playlists, which can be shared with friends. Enjoying a random individual's playlist? You can subscribe to it. Plus, its free. Free is always good, especially when its something useful. Check it out next time you're perusing the 'net.
Happy listening,
Michele
Subscribe to:
Posts (Atom)